If you want to extend your growing season and shield your plants, selecting the right plastic for your polytunnel is essential. I’ve found that choosing durable, high-quality plastic not only supports healthier plant growth but also improves harvests. With so many choices on the market, it’s important to pick the material that best matches your gardening needs.
The right plastic can provide insulation, UV protection, and durability against the elements. Whether you’re a seasoned gardener or just starting, understanding the benefits of different types of polytunnel plastic will help you create the perfect environment for your plants. Let’s dive into the world of polytunnel plastics and explore how you can transform your gardening experience.
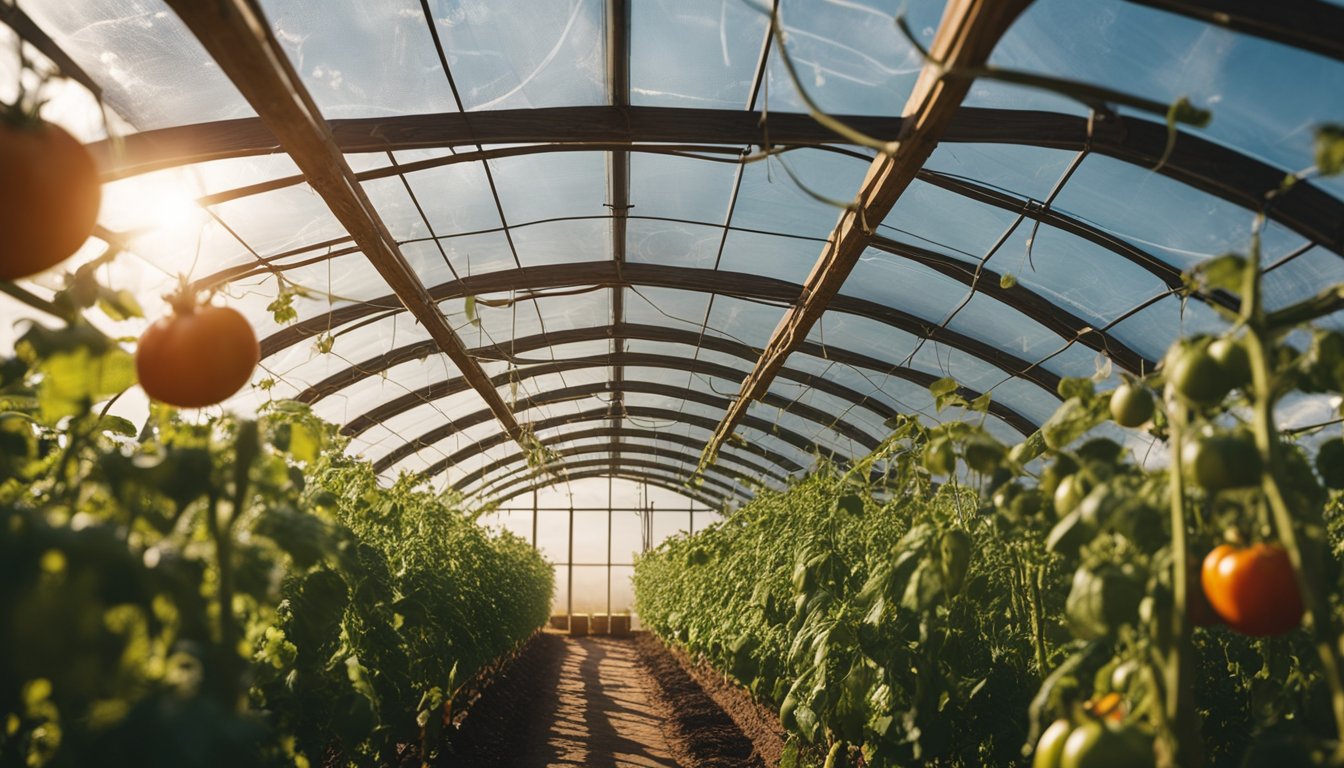
Overview Of Plastic For Polytunnel
Plastic plays a crucial role in polytunnels. It functions primarily as a cover, shielding plants from harsh weather and pests. Not all plastic is created equal, so selecting the right type is vital.
I find that UV-resistant plastic makes a big difference. This type prevents excessive sunlight from damaging plants while allowing beneficial light to filter through. Likewise, some plastics provide excellent insulation, keeping temperatures stable. This quality is particularly helpful during chilly nights.
I noticed that the thickness of the plastic also affects durability. Thicker materials resist tearing and fading better than thinner ones. For instance, 200-micron plastic offers decent protection for most growing conditions. Choosing the right gauge means I can extend my growing season effectively.
Different options exist for the plastic used in polytunnels. Some are reinforced to withstand strong winds and rain. Others are more flexible, making them easier to install and remove. I usually prefer the flexible types for quick setup during the gardening season.
When it comes to cost, I’ve found that higher-quality plastic, while more expensive initially, often lasts longer. Investing in durable materials pays off. Over time, that means fewer replacements and more savings.
Lastly, I can’t overlook the impact of clear plastic on plant growth. Clear options maximize sunlight exposure, promoting growth. That said, I also keep an eye on harvesting; just enough light makes all the difference.
Overall, understanding these aspects of polytunnel plastic helps me maximize both growth and yield. It’s all about making smart choices to create the perfect environment for my plants.
Types Of Plastic Used

Various types of plastic serve specific roles in polytunnels. Each option has distinct properties that can enhance plant growth and protect against weather extremes.
Polyethylene
Polyethylene reigns as the most popular choice for polytunnels. It’s lightweight and easy to handle. This plastic offers excellent UV protection, blocking harmful rays while keeping beneficial light available. I notice that growers often choose polyethylene in two thicknesses: 6 mil and 10 mil. The 6 mil offers affordability, while the 10 mil provides extra durability against tears. I find the flexibility of polyethylene appealing, making it easier to install. However, it might not last as long as some thicker options. Despite this, its clear version maximizes sunlight exposure, which is crucial for thriving plants.
Benefits Of Using Plastic For Polytunnel
Using plastic for polytunnels offers significant advantages for gardeners. It creates an ideal environment for plants while protecting them from various threats.
Enhanced Crop Growth
Plastic increases crop growth by maximizing sunlight exposure. Light filters through, giving plants the energy they crave. Some plastics even enhance light diffusion. This ensures even light distribution, boosting photosynthesis and yielding healthier plants. Plus, the warmth retained inside supports faster growth. I often notice stronger, more vibrant plants when I use high-quality plastic.
Weather Protection
Weather protection is another critical benefit of polytunnel plastic. Wind, rain, and frost can damage delicate plants. However, a well-constructed polytunnel acts as a shield. It minimizes exposure to harsh elements while allowing air circulation. UV-resistant plastic blocks harmful rays, preventing plant stress. During storms, I feel relieved knowing my plants are safe and sound inside the polytunnel. With good plastic, I enjoy peace of mind and thrive in my gardening endeavors.
Factors To Consider When Choosing Plastic

Choosing the right plastic for a polytunnel involves several key factors. Understanding these factors can greatly enhance plant growth and productivity.
UV Resistance
UV resistance matters significantly. UV rays can harm plants by causing stress and limiting growth. I prefer plastic that blocks harmful rays while still letting in essential sunlight. Some plastics offer added UV protection, ensuring plants receive the benefits of sunlight without suffering damage. Look for plastic labeled as UV-resistant to keep plants healthy. Remember, happier plants lead to bigger yields.
Thickness and Durability
Thickness plays a vital role in durability. Thicker plastic generally lasts longer and withstands harsh weather. For instance, a 10 mil option can resist tearing better than a 6 mil. When I set up my polytunnel, I usually choose thicker plastic for added toughness. Durable plastic may come with a higher price tag, but it pays off over time. It reduces replacement costs and keeps plants safe from wind and rain. Investing in quality plastic simply makes sense for any serious gardener.
Installation Tips For Polytunnel Plastic
To install polytunnel plastic correctly, start by gathering your materials. You’ll need high-quality plastic, clips, and tools for a snug fit. I recommend checking the weather report. Installing plastic on a calm day makes the process smoother.
Next, measure your polytunnel frame accurately. Precision here avoids excess plastic that can flap in the wind like a flag. Cut your plastic according to these measurements. Ease of handling depends on keeping those cuts clean and straight.
When laying the plastic, start from one end and work your way across. This method ensures even tension. If you face any wrinkles, don’t panic, smooth them out gently. I found that having a partner helps, especially when aligning the edges.
Timing matters. Secure the plastic while it’s warm for better elasticity. Warm plastic stretches easily and fits well over the frame’s curves. If it gets cool, it may stiffen and become difficult to handle. Use clips generously; they keep the plastic tight and secure.
How To Grow Food In Your Polytunnel

Growing food in a polytunnel creates a perfect environment for plants. First, choose the right crops that thrive in these conditions. Tomatoes, peppers, and cucumbers love the warmth and protection. Select vegetables that suit your climate and personal taste.
Next, prepare your soil. Use well-draining soil with the right nutrients. I often mix in compost for better fertility. Healthy soil leads to healthy plants.
Plant seeds or seedlings according to package instructions. Space them well; overcrowding can limit growth. I always keep a careful eye on watering, too. Don’t drown them, but don’t let them dry out either.
Monitoring temperature stays crucial. I keep my polytunnel ventilated to avoid overheating. Using shade cloth on particularly hot days helps protect plants from sunburn.
Pest control comes next. I like using organic methods like introducing helpful insects, such as ladybugs. They munch on aphids and keep my plants healthy.
Fertilize regularly. Liquid fertilizers work well; they provide nutrients directly when plants need them. I usually apply them every few weeks to maintain growth.
Harvesting is the exciting part. Pick fruits and vegetables when they’re ripe. Eating fresh produce straight from the garden makes all the hard work worthwhile!
Enjoy the journey of growing your food in your polytunnel. It’s rewarding to see plants flourish in their cozy environment.
What To Grow In A Polytunnel
Growing in a polytunnel offers a unique opportunity to cultivate various plants year-round. I enjoy selecting crops that thrive in the warmer conditions provided by the structure.
Tomatoes stand out as one of my favorites. These sun-loving plants flourish in the controlled environment, producing juicy fruit. I often grow several varieties, from cherry to beefsteak, each bringing its own flavor to the table.
Peppers also thrive in polytunnels. Their vibrant colors and crisp textures add excitement to any dish. I recommend trying sweet bell peppers or spicy jalapeños for a delightful kick.
Cucumbers, with their refreshing crunch, are another popular choice. They love the warmth and can grow abundant yields. I often train them to climb for better airflow and easier harvesting.
Leafy greens like lettuce and spinach grow well in the cool shade of a polytunnel. I enjoy planting several types together to create a colorful salad mix. Their fast growth means I can enjoy fresh greens in no time.
Herbs bring incredible flavor to my cooking. Basil, parsley, and cilantro flourish in the polytunnel’s cozy climate. I snip fresh herbs often, enhancing my meals with vibrant flavors.
Don’t forget about root vegetables. Carrots and radishes adapt well to polytunnel conditions, providing a delightful crunch. Plus, they’re fun to pull out of the soil!
Growing in a polytunnel doesn’t just make me a better gardener; it also brings joy and delicious produce to my kitchen. Whether it’s a fresh salad or a hearty stew, every harvest is a celebration.
How To Use A Polytunnel

Using a polytunnel is straightforward and rewarding. First, set up the structure on flat ground. Position it away from trees to maximize sunlight exposure. Next, ensure the entrance faces away from prevailing winds to reduce stress on plants.
Soil Preparation
I recommend starting with soil preparation. Clear the area of debris and rocks. Loosen the soil with a tiller, improving aeration and drainage. Consider adding compost for added nutrients. Well-prepared soil sets the stage for healthy plant growth.
Choosing Plants
Choose your plants. Popular options include tomatoes, peppers, and herbs. These thrive in warm conditions. For a fun twist, try growing strawberries or dwarf fruit trees, which can surprise your taste buds. Don’t forget to stagger planting times to enjoy a continuous harvest.
Watering
Watering happens next. Employ a drip irrigation system for efficiency. It delivers water directly to plant roots, reducing waste. Check soil moisture regularly to avoid overwatering. Plants appreciate attention.
Ventilation
Ventilation is crucial. Open windows or doors to promote air circulation. This helps regulate temperature and humidity levels. A fan can also provide gentle airflow. Keep an eye out for condensation on plastic; it indicates excess moisture.
Pest management
Pest management requires vigilance. Inspect plants regularly for any signs of pests. Organic methods, like introducing beneficial insects, work wonders. Companion planting can deter some unwanted guests. Remember, it’s easier to manage pests early rather than letting them multiply.
Crop Rotation
Consider crop rotation next season. This enhances soil health and reduces disease risk. Rotate different plant families in and out of the polytunnel. It keeps soil nutrients balanced while keeping pests guessing.
I keep track of all activities in a gardening journal. Jotting down planting dates, successes, and challenges provides great insight for future seasons. Reflecting on progress can inspire new farming adventures.
Enjoy your time in the polytunnel. Gardening brings satisfaction and delicious results. With proper care, it’s a joyful experience that keeps plants thriving and me happy.
Polytunnel Planting Plan
Planning your polytunnel layout shapes your gardening success. I like to start by choosing the right plants. Tomatoes, peppers, and herbs thrive in these environments. Each plant has unique needs, so it’s vital to consider their space requirements.
Spacing
Spacing matters. I typically plant tomatoes 18 to 24 inches apart. This distance allows air circulation, which helps prevent diseases. Peppers, on the other hand, can be closer together at about 12 to 18 inches apart. The right spacing can create a cozy home for each plant without crowding them.
Watering Techniques
Watering techniques play a significant role. Drip irrigation systems save time and conserve water. I find that targeting plant roots directly promotes healthier growth. Always check the moisture level before watering. Overwatering can hurt your plants, so I make it a point to feel the soil first.
Ventilation
Ventilation is another key consideration. Opening vents lets fresh air in and reduces humidity. If I notice my polytunnel feeling stuffy, I adjust the vents for better airflow. A little bit of breeze can do wonders for happy plants.
Pest Management
Pest management is an essential part of the plan. I prefer organic methods, like introducing beneficial insects. Ladybugs enjoy munching on aphids. This natural approach keeps my garden healthy without harsh chemicals.
Crop Rotation
Crop rotation enhances soil health over time. Planning my rotations keeps nutrients balanced. I like to move plants to different spots in the polytunnel each season. This method reduces disease and boosts crop yield.
I also keep a gardening journal. Documenting my experiences helps me track progress and learn from mistakes. It’s entertaining to look back and see the growth of my green thumb.
Following these guidelines creates a thriving polytunnel garden. With careful planning, I find my plants flourish under the right conditions. Gardening is a delightful journey, and my polytunnel contributes to that joy.
Growing Tomatoes In Polytunnel

Growing tomatoes in a polytunnel offers several advantages. It creates a warm environment that fosters quick growth. The controlled climate keeps pests away and wards off harsh weather.
I typically choose determinate tomato varieties. These types stop growing after reaching a certain height, making them perfect for smaller spaces. I space the plants at least 18 inches apart to ensure good air circulation. This spacing helps prevent mold and other diseases.
Watering tomatoes requires a bit of thought. I prefer using a drip irrigation system. This method delivers moisture directly to the roots. It also minimizes water waste and keeps leaves dry, reducing disease risk.
Ventilation plays a vital role in maintaining a healthy environment. I open the polytunnel during warm days to allow fresh air in. This keeps humidity levels in check. High humidity can lead to rot, and I don’t want my tomatoes turning to mush.
Pest management is crucial. I often introduce beneficial insects like ladybugs. They eat aphids and keep the pest population in line. Also, I check the plants regularly for any signs of trouble. Early detection makes handling pests much easier.
I practice crop rotation to keep soil healthy. Each year, I move my tomatoes to a new spot in the polytunnel. This prevents nutrient depletion and keeps pests from settling in. Having a gardening journal also helps me track what works year by year.
I harvest tomatoes when they reach their bright color. The taste of fresh tomatoes beats anything store-bought. Plus, there’s no better feeling than eating food I’ve grown myself. My polytunnel makes it possible to enjoy this fruit all summer long.
Before You Go – Choosing the Best Plastic for Polytunnel
Choosing the right plastic for your polytunnel can truly transform your gardening experience. It’s not just about protecting your plants; it’s about creating an environment that fosters growth and maximizes yields. With options like UV-resistant and thicker materials, I’ve found that investing in quality pays off in the long run.
By carefully considering factors like thickness and UV protection, I can ensure my plants thrive regardless of the weather. Plus, the joy of seeing my garden flourish under the right conditions is incredibly rewarding. So whether you’re a seasoned gardener or just starting out, making informed decisions about polytunnel plastic will set you on the path to gardening success. Don’t forget to add The Herb Prof to your favorites so you don’t miss out on future articles.
References – Choosing the Best Plastic for Polytunnel
Little Herb Encyclopedia, by Jack Ritchason; N.D., Woodland Publishing Incorporated, 1995
The Ultimate Healing System, Course Manual, Copyright 1985, Don Lepore
Planetary Herbology, Michael Tierra, C.A., N.D., Lotus Press, 1988
Handbook of Medicinal Herbs, by James A. Duke, Pub. CRP Second Edition 2007
The Complete Medicinal Herbal, by Penelope Ody, Published by Dorling Kindersley
Check the Following Articles
Benefits of Fennel Tea: A Must-Try for Health and Wellness
New Zealand Spinach: A Nutritious and Versatile Green
Best Herbal Sleep Aids From Amazon: Top Picks
Managing Oxalis Weeds in Lawn: Effective Tips
Frequently Asked Questions – Choosing the Best Plastic for Polytunnel
What is the best plastic for polytunnels?
High-quality polyethylene is often the best choice for polytunnels due to its lightweight nature and excellent UV protection. Consider using 6 mil for affordability or 10 mil for added durability against tears.
Why is UV resistance important in polytunnel plastic?
UV resistance is crucial as it protects plants from harmful rays that can cause stress and hinder growth. It allows beneficial light to filter through, promoting healthy plant development.
How thick should polytunnel plastic be?
Thicker plastic generally provides better durability and protection against harsh weather. A thickness of 10 mil is recommended for those needing enhanced tear resistance, while 6 mil is suitable for more affordable options.
Can using plastic in polytunnels improve plant growth?
Absolutely! Plastic covers create a controlled environment that maximizes sunlight exposure and promotes even light distribution, enhancing photosynthesis and resulting in healthier, more productive plants.
What are the benefits of using a polytunnel?
Polytunnels shield plants from harsh weather, pests, and diseases, allowing for better air circulation and moisture control. They create an ideal growing environment that leads to increased yields.
How do I manage pests in a polytunnel?
Introduce beneficial insects, regularly inspect plants for early signs of issues, and maintain good air circulation to prevent diseases. These strategies enhance pest management and promote healthy growth.
What are some tips for growing tomatoes in a polytunnel?
Choose determinate varieties and space them 18 inches apart for good airflow. Implement a drip irrigation system and ensure proper ventilation to regulate humidity for optimal growth.
Is investing in high-quality plastic worth it?
Yes, while high-quality plastic may have a higher initial cost, it typically lasts longer and reduces replacement expenses over time, providing better protection for your plants.