Microgreen plants are a popular choice for both home gardeners and commercial growers. These young plants are harvested just after the first leaves have emerged. Packed with nutrients, they are easy to grow and add a fresh, flavorful touch to any dish.
One of the biggest advantages of growing microgreens is their fast growth rate. Most microgreens can be harvested in just a few weeks, making them a great option for those who want to enjoy fresh greens without waiting for a full garden to mature. Additionally, microgreens are easy to grow even in small spaces, making them a popular choice for urban gardeners and those with limited outdoor space.
Microgreens come in a variety of flavors and textures, from spicy radish to sweet pea shoots. They are a great addition to salads, sandwiches, and smoothies, and can even be used as a garnish for more complex dishes. Whether you are a seasoned gardener or just starting, microgreens are a fun and easy way to add fresh greens to your diet.
What Are Microgreens?
Microgreens grow as young plants harvested just a few weeks after germination. They sit between sprouts and baby greens in terms of maturity. Farmers and home growers harvest microgreens when they reach 1–3 inches tall and develop their first true leaves. These plants display a variety of colors, shapes, and flavors, ranging from sweet to spicy.
Microgreens deliver nutrients, vitamins, minerals, and antioxidants in concentrated amounts. They provide vitamins A, C, and K, along with iron, calcium, and potassium. Researchers in the Journal of Agricultural and Food Chemistry found that microgreens contain up to 40 times more nutrients than mature plants.
Microgreens support health with their high nutritional value. They improve digestion, lower the risk of chronic diseases, and increase energy levels. They also boost the immune system and strengthen overall wellness. Gardeners can grow microgreens easily all year round in soil or hydroponic systems. These plants require minimal space and resources, making them accessible to anyone.
Benefits of Consuming Microgreen Plants
As someone who consumes microgreens regularly, I can confidently say they make a great addition to any diet. Microgreens grow as young plants harvested after the first few leaves develop. They deliver nutrients, vitamins, and minerals that play essential roles in maintaining good health.
One of the main benefits of eating microgreens comes from their high nutritional value. A study in the Journal of Agricultural and Food Chemistry shows that microgreens contain up to 40 times more nutrients than mature plants.
Microgreens provide vitamins A, C, E, and K, along with minerals such as iron, zinc, and potassium. They also supply antioxidants. These compounds protect the body from damage caused by free radicals.
Free radicals act as unstable molecules that damage cells and contribute to diseases such as cancer. Eating foods rich in antioxidants, including microgreens, helps reduce the risk of developing these diseases.
In addition to their nutritional value and antioxidant content, microgreens deliver several health benefits. A study in the Journal of Agricultural and Food Chemistry found that microgreens lower cholesterol levels in the blood.
Another study in the Journal of Nutrition and Metabolism showed that eating microgreens improves digestion and reduces inflammation in the body.
Getting Started with Microgreen Plants
Microgreens give you a great way to grow nutrient-dense greens indoors or outdoors, in any season and almost any environment. Keep a few key points in mind when you start growing microgreens.
Choosing the Right Seeds
Consider a few factors when you choose seeds for microgreens. Select seeds specifically labeled for microgreens to ensure success. Popular options include pea, broccoli, cress, arugula, mustard, radish, and sunflower.
Selecting a Growing Medium – Microgreen Plants
The growing medium you choose will depend on whether you’re growing your microgreens indoors or outdoors. If you’re growing your microgreens indoors, you can use soil, peat, compost, potting soil, perlite, or vermiculite as your growing medium. If you’re growing your microgreens outdoors, you’ll want to choose a spot with good soil and plenty of sun.
Proper Watering Techniques
Water microgreens properly to keep them healthy. Add water whenever the soil looks dry, usually at least once a day. Mist them with a spray bottle or water from the bottom to avoid oversaturation. If you grow microgreens hydroponically, keep the water oxygenated and maintain the correct pH range.
Optimal Growing Conditions – Microgreen Plants
As a microgreen grower, I know that providing the right growing conditions determines the success of your crop. In this section, I discuss the optimal growing conditions for microgreens.
Lighting Requirements
Microgreens require a lot of light to grow properly. If you are growing them indoors, place them near a window where they can get plenty of sunlight. However, if you are growing them in a room with limited sunlight, you may need to invest in a grow light. A grow light will provide the necessary light for your microgreens to grow.
Temperature and Humidity – Microgreen Plants
Temperature and humidity are also important factors to consider when growing microgreens. The ideal temperature range for microgreens is between 60°F and 75°F (15°C to 24°C). If the temperature is too high, your microgreens will start to wilt, and if it’s too low, they will grow slowly.
To maintain the right temperature, you may need to use a heater or air conditioner. In addition to temperature, humidity is also important. Microgreens require a humid environment to grow properly. You can increase the humidity by placing a tray of water near your microgreens or by using a humidifier.
Managing Germination
Germination is the process of a seed sprouting and growing into a seedling. Managing germination is crucial to the success of your microgreens. To ensure proper germination, you need to keep the soil moist but not too wet. Overwatering can cause the seeds to rot, while under-watering can cause them to dry out and die. To manage germination, you can cover the seeds with a lid or plastic wrap until they sprout. This will help keep the soil moist and provide a humid environment for the seeds to germinate.
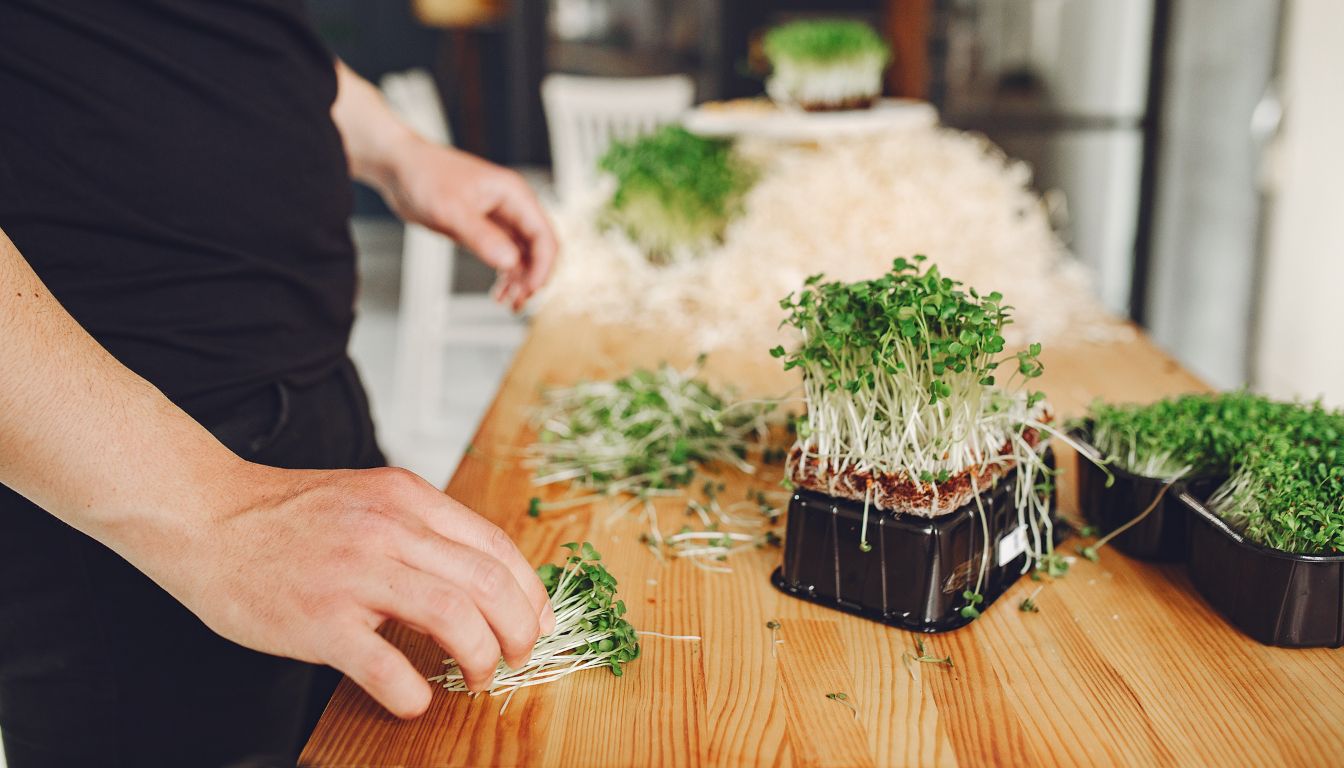
Harvesting and Using Microgreen Plants
Microgreens add versatility and nutrition to any diet. You can mix them into salads, sandwiches, soups, smoothies, and juices, or use them as a garnish to bring color and flavor to any dish.
When and How to Harvest
Microgreens are usually ready to harvest 7 to 14 days after germination. Many are harvested once the cotyledons are fully developed, and the first true leaves are just starting. However, pea shoots and some other microgreens can be harvested with multiple leaves. Harvesting microgreens too late can mean bitter, tougher greens.
To harvest microgreens, use a pair of clean scissors to cut the stems just above the soil line. Be sure to harvest only what you need, as microgreens are best when fresh. To promote continued growth, water the remaining plants lightly after harvesting.
Incorporating Microgreens into Your Diet – Microgreen Plants
Microgreens are a great way to add flavor and nutrition to your meals. They are packed with vitamins and minerals and can be used in a variety of dishes. Try adding microgreens to your salads, sandwiches, and soups for a fresh burst of flavor. They can also be used as a garnish to add color and texture to your dishes. For a quick and easy snack, try adding microgreens to your smoothies or juices. They can also be used to make pesto or other sauces for pasta or meat dishes.
Storing and Preserving Freshness
To preserve the freshness of your microgreens, store them in the refrigerator in a loose plastic bag or container. Be sure to use them within a few days for the best results. If your microgreens start to wilt or lose their color, they may be past their prime and should be discarded.
Types of Microgreen Plants

Microgreens are tiny plants that are harvested when they are just a few inches tall. They are packed with nutrients and can be grown indoors or outdoors.
There are many different types of microgreens, each with its own unique flavor and texture. In this section, I will discuss some of the most popular varieties of microgreens and some unique flavors and textures that you can try.
Popular Varieties
Here are some of the most popular types of microgreens:
- Pea: Pea microgreens have a sweet, delicate flavor and are perfect for salads and sandwiches.
- Broccoli: Broccoli microgreens have a mild, earthy flavor and are packed with nutrients.
- Cress: Cress microgreens have a peppery flavor and are great for adding a bit of spice to your dishes.
- Arugula: Arugula microgreens have a spicy, nutty flavor and are perfect for adding to salads.
- Mustard: Mustard microgreens have a spicy, pungent flavor and are great for adding to sandwiches and wraps.
- Kale: Kale microgreens have a mild, sweet flavor and are packed with nutrients.
- Endive: Endive microgreens have a slightly bitter flavor and are great for adding to salads.
- Cabbage: Cabbage microgreens have a mild, sweet flavor and are perfect for adding to sandwiches and wraps.
- Spinach: Spinach microgreens have a mild, sweet flavor and are packed with nutrients.
Unique Flavors and Textures – Microgreen Plants
If you’re looking for something a bit different, here are some unique flavors and textures to try:
- Basil: Basil microgreens have a sweet, aromatic flavor and are perfect for adding to Italian dishes.
- Fennel: Fennel microgreens have a sweet, licorice-like flavor and are great for adding to salads.
- Chard: Chard microgreens have a mild, earthy flavor and are packed with nutrients.
- Sorrel: Sorrel microgreens have a tangy, lemony flavor and are perfect for adding to salads and sandwiches.
- Cilantro: Cilantro microgreens have a fresh, citrusy flavor and are great for adding to Mexican dishes.
- Watercress: Watercress microgreens have a spicy, peppery flavor and are packed with nutrients.
- Amaranth: Amaranth microgreens have a nutty, earthy flavor and are great for adding to salads.
- Buckwheat: Buckwheat microgreens have a nutty, earthy flavor and are perfect for adding to sandwiches and wraps.
- Wheatgrass: Wheatgrass microgreens have a sweet, earthy flavor and are packed with nutrients.
Advanced Microgreen Plants Growing Techniques
As an experienced microgreen grower, I have experimented with various techniques to improve yields, nutrient content, and overall plant health. In this section, I will share some of my favorite advanced microgreen growing techniques that have yielded impressive results.
Hydroponic Systems
Hydroponic systems are an excellent way to grow microgreens, especially for those who want to grow plants indoors. Hydroponics refers to a method of growing plants without soil, using nutrient-rich water instead. The benefits of hydroponic systems include intense nutrient delivery to the plants, which can result in faster growth and higher nutrient content.
One of my favorite hydroponic systems is the ebb and flow system, which uses a tray filled with nutrient-rich water that floods the tray periodically. This system ensures that the roots of the microgreens are constantly in contact with the nutrient-rich water, resulting in rapid growth and increased nutrient content.
Regrowing and Crop Rotation
Regrowing microgreens is a great way to save money and reduce waste. Instead of throwing away the roots and soil, you can regrow a new batch of microgreens from the same roots. To do this, simply cut the microgreens above the soil level and leave the roots intact. Then, add fresh soil to the tray and replant the roots.
Crop rotation is another technique that can help improve the health and yield of your microgreens. Crop rotation involves alternating the types of microgreens you grow in a particular tray. This technique helps prevent soil-borne diseases and pests from building up in the soil, which can lead to reduced yields and poor plant health.
Microgreen Plants Kits and Accessories
As someone who loves growing microgreens, I have found that having the right kit and accessories can make all the difference in the success of my crops. Here are some of my favorite microgreen kits and accessories that I recommend to anyone looking to grow their own microgreens at home.
Microgreen Kits
Microgreen kits come in all shapes and sizes, and choosing the right one for you depends on your personal preferences and needs. Some kits come with everything you need to get started, while others require you to purchase additional supplies. Here are a few of my favorite microgreen kits:
- AeroGarden Microgreens Kit: This kit is perfect for beginners and comes with everything you need to grow your own microgreens, including a grow tray, seed pods, and nutrients. The AeroGarden also has a built-in grow light, so you don’t have to worry about purchasing one separately.
Microgreen Trays
Microgreen trays come in a variety of sizes and materials, and choosing the right one for you depends on your growing space and personal preferences. Here are a few things to consider when choosing a microgreen tray:
- Size: Make sure the tray is the right size for your growing space. If you have limited space, consider using smaller trays.
- Material: Microgreen trays can be made from plastic, metal, or other materials. Plastic trays are lightweight and easy to clean, while metal trays are more durable.
- Drainage: Make sure the tray has adequate drainage to prevent water from pooling and causing mold or mildew.
Grow Lights
If you’re growing microgreens indoors, a grow light is essential to provide the necessary light for your plants to grow. Here are a few things to consider when choosing a grow light:
- Type: There are several types of grow lights, including fluorescent, LED, and HID. LED grow lights are the most energy-efficient and produce less heat, making them a great option for indoor growing.
- Wattage: The wattage of your grow light will depend on the size of your growing space. Make sure to choose a light that provides enough coverage for your plants.
- Spectrum: Different plants require different spectrums of light. Make sure to choose a grow light that provides the right spectrum for your microgreens.
Challenges and Troubleshooting – Microgreen Plants
Microgreens are easy to grow, but they are not immune to challenges. In this section, I will cover some of the common issues that you may encounter when growing microgreens and how to troubleshoot them.
Dealing with Pests and Diseases
Pests and diseases are the most common challenges when growing microgreens. Aphids, spider mites, and thrips are some of the pests that can attack your microgreens. These pests can cause damage to the leaves, stems, and roots of the plants. Diseases such as damping-off, powdery mildew, and root rot can also affect your microgreens.
To prevent pests and diseases, it is important to maintain good hygiene in your growing area. Keep your growing trays clean and disinfected. Use a sterile growing medium and avoid overwatering your plants. If you notice any signs of pests or diseases, remove the affected plants immediately to prevent further spread.
Environmental Stress Factors
Environmental stress factors such as temperature, humidity, and light can also affect the growth of your microgreens. High temperatures can cause the plants to wilt, while low temperatures can slow down their growth. Humidity that is too high can lead to mold growth, while low humidity can cause the plants to dry out.
To avoid environmental stress factors, it is important to provide the right growing conditions for your microgreens. Keep the temperature between 60-75°F and maintain a humidity level of 40-60%. Provide enough light for your plants, but avoid direct sunlight as it can cause the plants to overheat.
Before You Go – Microgreen Plants

Microgreens may be tiny, but they pack a powerful punch of flavor and nutrition. Growing them at home gives you quick access to fresh greens that elevate your meals while supporting a healthy lifestyle. With minimal space, simple supplies, and just a little care, you can enjoy a steady harvest of vibrant plants year-round.
Before you go, remember that experimenting with different varieties like radish, arugula, or sunflower can introduce new tastes and textures to your dishes. Microgreen plants offer an easy, sustainable way to connect with your food and bring freshness straight from your windowsill to your plate.
Don’t forget to add theherbprof.com homepage to your favourites so you don’t miss out on future articles!
References – Microgreen Plants
Little Herb Encyclopedia, by Jack Ritchason; N.D., Woodland Publishing Incorporated, 1995
The Ultimate Healing System, Course Manual, Copyright 1985, Don Lepore
Planetary Herbology, Michael Tierra, C.A., N.D., Lotus Press, 1988
Handbook of Medicinal Herbs, by James A. Duke, Pub. CRP Second Edition 2007
The Complete Medicinal Herbal, by Penelope Ody, Published by Dorling Kindersley
Check the Following Articles
Nutritional Value of Tomatoes: Best Fruit Or Vegetable?
Organic Ant Repellent: Natural Solutions You Got To Try
Obscure Vegetable Names: A Guide to Unique Varieties
Ladybug Elimination: How To Be Ladybug-Free
Frequently Asked Questions – Microgreen Plants
What are the nutritional benefits of consuming microgreens?
Microgreens pack nutrients and minerals and deliver higher nutrient density than mature plants. They provide vitamins A, C, and K, along with iron, calcium, and potassium. A study in the Journal of Agricultural and Food Chemistry shows microgreens contain up to 40 times more nutrients than mature counterparts.
How does one effectively grow microgreens indoors?
You can grow microgreens indoors easily and cost-effectively to add fresh greens to your diet. Use a shallow container, organic soil, and seeds. Choose a container at least 2–3 inches deep with drainage holes. Fill it with soil, sprinkle seeds on top, and cover lightly. Water the seeds and place the container in a sunny spot. Keep the soil moist but not waterlogged, and seeds germinate within a few days.
Which varieties of microgreens are best suited for beginners?
Beginners should start with easy-to-grow microgreens such as sunflower, radish, broccoli, and pea shoots. These varieties grow quickly, require little maintenance, and reach harvest in 7–10 days.
What are the common challenges faced when cultivating microgreens?
Growers often face challenges like overwatering, overcrowding, and poor air circulation. Overwatering causes mold and root rot. Overcrowding forces plants to compete for resources and stunts growth. Poor air circulation traps moisture and increases the risk of fungal diseases.
How can microgreens be incorporated into daily meals?
You can add microgreens to salads, sandwiches, soups, and smoothies. They bring flavor and color to dishes and boost nutrient density. Use them as a garnish to add texture and a pop of color to meals.
What is the typical growth cycle for a microgreen crop?
Microgreens grow and reach harvest depending on variety and conditions. Most varieties take 7–14 days after planting. Sunflower and pea shoots may take up to 21 days. Monitor growth closely and harvest at the right time to ensure flavor and nutrition.