Propagating mint cuttings is an easy and cost-effective way to grow new mint plants. Mint is a popular herb used in cooking, teas, and even as a natural insect repellent. It’s an ideal plant for beginners because it’s easy to grow and propagate. In this article, I’ll share my knowledge and experience on propagating mint cuttings.
Mint cuttings can be propagated in water or soil. Water propagation is a popular method as it is easy to monitor root growth and is an excellent way to teach children about plant propagation. Soil propagation is also a great option as it allows the plant to establish roots in its final growing location. I will cover both methods in detail and provide tips on how to ensure successful propagation. Additionally, I will share how to care for your new mint plant after propagation, including tips on pruning and harvesting.
Growing mint from cuttings is an excellent way to expand your herb garden or share plants with friends and family. Mint plants are hardy and can be grown indoors or outdoors, making them a versatile addition to any garden. By propagating your own mint cuttings, you can save money and have a fresh supply of mint on hand whenever you need it. In the following section, I will provide step-by-step instructions on how to propagate mint cuttings and care for your new plants.
Understanding Mint Propagation
Mint is a perennial herb that can be propagated by cuttings. Propagation is the process of creating new plants from existing ones, and with mint, it’s as simple as taking a cutting and rooting it in water or soil.
Types of Mint Cuttings
There are two types of mint cuttings: stem cuttings and root cuttings. Stem cuttings are the most common type of cutting used to propagate mint. Stem cuttings are taken from the parent plant and rooted in water or soil. Root cuttings, on the other hand, are taken from the roots of the parent plant and rooted in soil.
When taking stem cuttings, it’s important to cut just below a node. A node is where a leaf or a stem grows from the main stem. Cutting below a node will encourage the cutting to produce roots. Each cutting should have at least two nodes and a few leaves. Remove the lower leaves from the cutting, leaving only a few at the top.
Best Time for Propagation
The best time to take mint cuttings is in late spring or early summer when the plant is actively growing. This is when the plant is producing new growth and is most likely to root successfully.
It’s important to use healthy and mature plants when taking cuttings. Choose a plant that is free from disease and pests. Avoid taking cuttings from a plant that is stressed or in poor health.
Propagating mint from cuttings is an easy and cost-effective way to get new plants. By understanding the types of cuttings and the best time for propagation, you can successfully propagate mint and enjoy the benefits of this versatile herb.
Preparing for Propagation
Propagating mint from cuttings is a simple and rewarding process that can be done by any gardener. Before starting the propagation process, it is important to prepare properly to ensure the success of the cuttings. In this section, I will outline the steps needed to prepare for propagating mint cuttings.
Selecting a Healthy Mint Stem
The first step in preparing for propagation is to select a healthy mint stem. It is important to choose a stem that is young, healthy, and disease-free. A healthy stem will have bright green leaves and a sturdy stem. Avoid stems that are yellow or brown, as these are signs of disease or damage.
To select the perfect stem, look for one that is at least 4 inches long and has several sets of leaves. It is also important to choose a stem that has not yet flowered, as flowering can reduce the chances of successful propagation.
Tools and Materials Needed
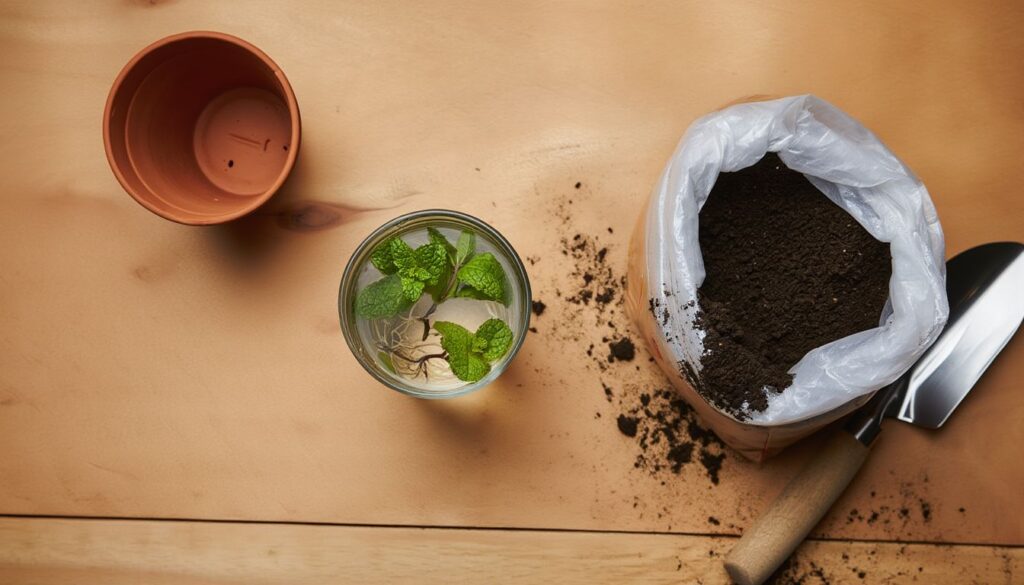
To prepare for propagating mint cuttings, you will need a few tools and materials. These include:
- Pruning shears or sharp scissors: These will be used to cut the stem from the parent plant. Make sure they are clean and sharp to avoid damaging the stem.
- Rooting hormone: This is an optional but helpful material that will encourage the stem to grow roots.
- Container: This will be used to hold the cutting while it grows roots. A small pot or a glass of water will work.
Once you have selected a healthy stem and gathered your tools and materials, you are ready to start propagating your mint cuttings.
Cutting Technique
When propagating mint cuttings, it is important to use proper cutting technique to ensure success. In this section, I will cover the two most important aspects of cutting technique: making the cut, leaf removal and node identification.
Making the Cut
To take a cutting from a mint plant, use a sharp, clean pair of scissors or pruning shears. Cut a 3 to 4 inch (7.6 to 10.2 cm) piece of mint stem just below a node, which is where the plant branches off. It is important to use a healthy stem that has bright green leaves on it.
When cutting, be sure to make a clean cut at a 45-degree angle. This will increase the surface area of the cut, allowing for more water absorption and nutrient uptake. Avoid crushing or damaging the stem, as this can inhibit the growth of the new plant.
Leaf Removal and Node Identification
After cutting, remove the bottom leaves from the stem, leaving only a few leaves at the top. This will reduce the amount of water loss through transpiration and allow the cutting to focus its energy on root growth.
Identify the nodes on the stem, which are the points where leaves emerge. Nodes are important because they contain the cells that will differentiate into roots. Be sure to leave at least two nodes on the stem when taking the cutting, as this will increase the chances of successful propagation.
Proper cutting technique is essential for the successful propagation of mint cuttings. When taking a cutting, use a sharp, clean pair of scissors or pruning shears and make a clean cut at a 45-degree angle. Remove the bottom leaves from the stem and identify the nodes to ensure successful root growth.
Rooting Mint Cuttings
Propagating mint from cuttings is an easy and cost-effective way to expand your mint collection. In this section, I will describe two methods for rooting mint cuttings: the water rooting method and the soil rooting method.
Water Rooting Method
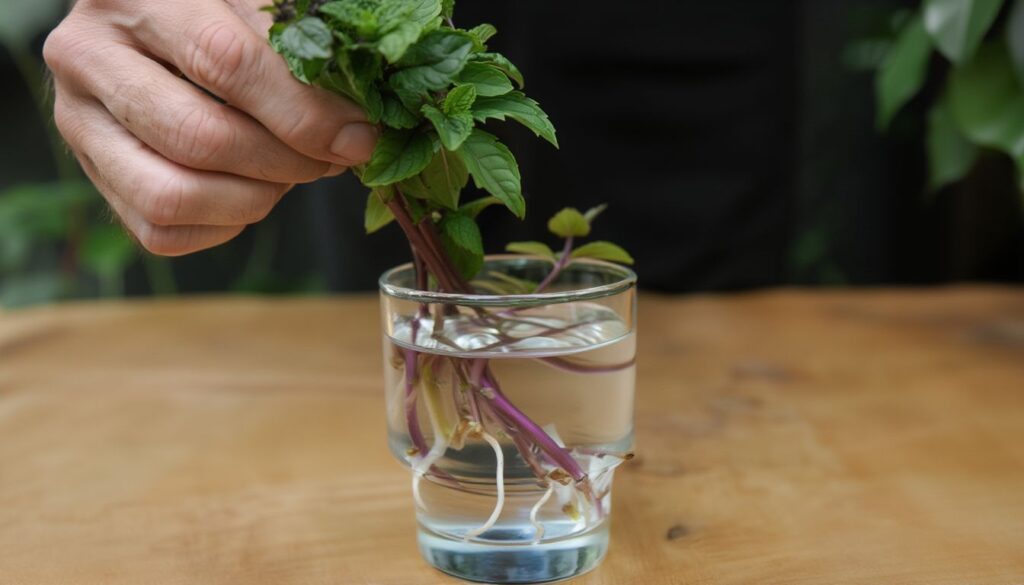
The water rooting method is a popular way to root mint cuttings. To start, cut a 3 to 4-inch piece of mint stem just below a node. Make sure to use a healthy stem with bright green leaves on it. Remove the lower leaves from the stem, leaving only the top few leaves.
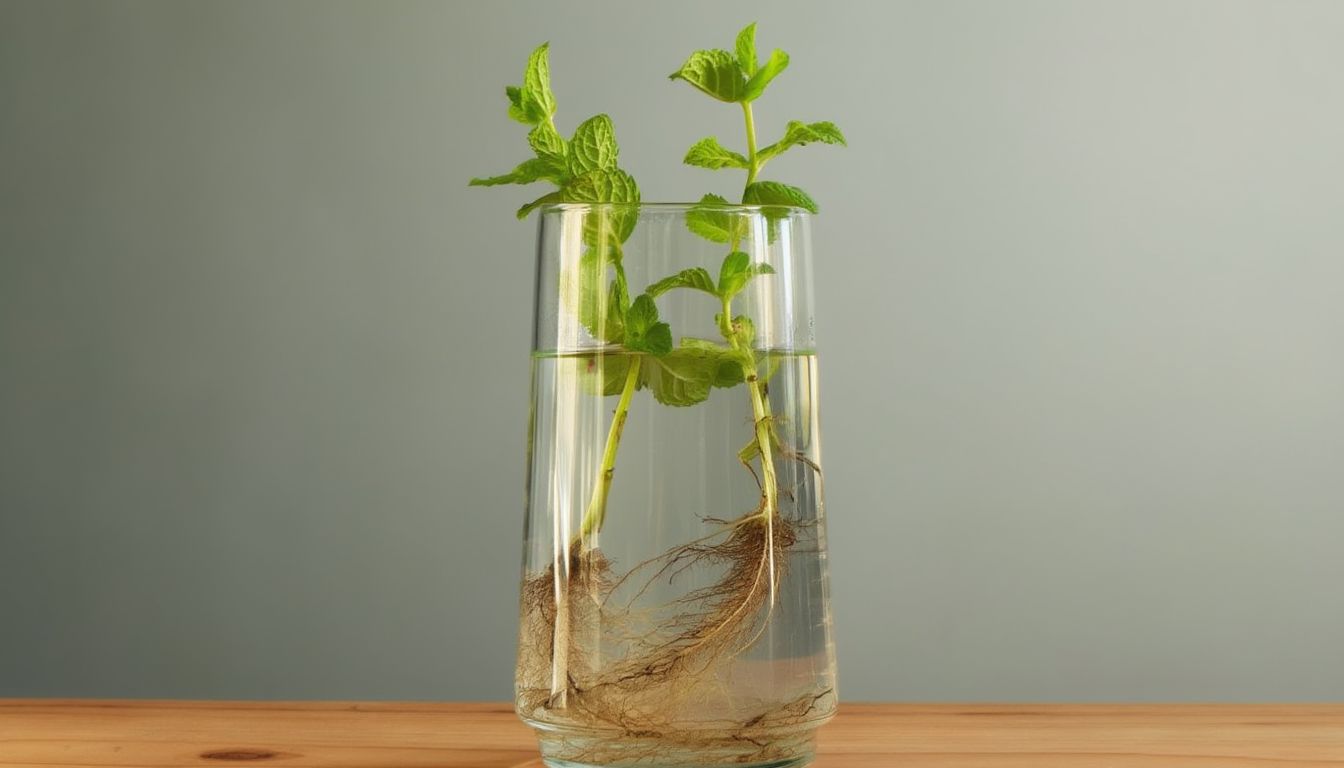
Next, place the mint stem in a glass jar or container with about an inch of water in the bottom. Make sure the stem is submerged in the water, but the leaves are not. Place the container in a bright, indirect light location. Change the water every few days or whenever it begins to look murky.
After a few weeks, the mint stem will develop roots. Once the root system is well established, you can transplant the mint into a potting soil.
Soil Rooting Method
The soil rooting method is another way to root mint cuttings. To start, prepare a potting soil mixture that is well-draining and moist. Cut a 3 to 4-inch piece of mint stem just below a node. Remove the lower leaves from the stem, leaving only the top few leaves.
Next, moisten the bottom of the mint stem and dip it into a rooting hormone powder. This will encourage root growth. Insert the mint stem into the prepared potting soil mixture and cover it with a plastic bag to create a humid environment. Place the pot in a bright, indirect light location.
After a few weeks, the mint stem will develop roots. Once the root system is well established, you can transplant the mint into a larger pot or directly into your garden.
In conclusion, rooting mint cuttings is an easy and cost-effective way to expand your mint collection. Whether you choose the water rooting method or the soil rooting method, with a little patience and care, you can have a thriving mint plant in no time.
Aftercare and Transplanting
Caring for New Growth
Once your mint cuttings have rooted and new growth has emerged, it’s important to provide them with proper care to ensure they continue to thrive. Keep the new plants in a bright location with indirect sunlight and avoid exposing them to direct sunlight. Direct sunlight can cause the plants to dry out and wilt, so it’s best to keep them in a shaded area until they have established themselves.
Make sure the plants are getting enough water, but be careful not to overwater them. Overwatering can lead to root rot and other problems. I recommend checking the soil moisture level regularly by sticking your finger into the soil up to your first knuckle. If the soil feels dry, it’s time to water the plants.
When to Transplant
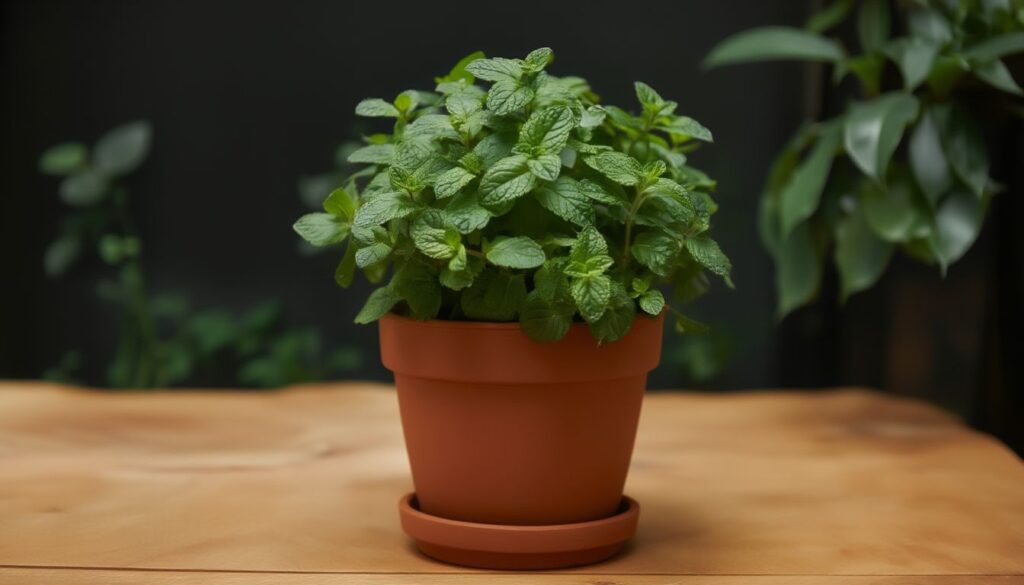
Once your mint cuttings have established themselves and are growing well, it’s time to transplant them into larger pots. This will give the plants more room to grow and allow their roots to spread out and develop. I recommend using a potting mix that is well-draining and nutrient-rich.
Choose a small pot with a drainage hole to ensure excess water can escape and prevent the roots from sitting in water. Fill the pot with potting mix and make a hole in the center for the plant. Gently remove the plant from its current container and loosen the roots before placing it in the new pot. Fill in around the plant with more potting mix, making sure to leave a little room at the top for watering.
Water the plant thoroughly after transplanting and place it in a bright, shaded location. Keep an eye on the soil moisture level and water as needed to keep the soil moist but not waterlogged.
Remember that mint is a fast-growing plant and can quickly outgrow its container. If you notice the plant becoming root-bound or the soil drying out too quickly, it may be time to transplant it again into an even larger pot.
Optimizing Growth Conditions
Light and Location
To optimize the growth of mint cuttings, it is important to provide the right amount of light. Mint plants prefer bright, indirect light, but can also tolerate full sun. However, it is important to note that direct sunlight can scorch the leaves and stunt the growth of the plant. Therefore, it is recommended to place the mint cuttings in a location that receives indirect sunlight for at least 4-6 hours a day.
Watering and Feeding
Mint plants require consistent moisture to thrive. It is important to water the cuttings regularly, but also avoid overwatering as this can lead to root rot. A good rule of thumb is to water the mint cuttings once the top layer of soil feels dry to the touch. It is also recommended to fertilize the plants with compost or a balanced fertilizer every 4-6 weeks to provide necessary nutrients for growth.
Soil and Pot Selection – Propagating Mint Cuttings
Mint plants prefer soil with good drainage. It is important to select a pot with drainage holes to prevent water from accumulating in the soil. The soil should also be well-draining and rich in organic matter. A good soil mix for mint cuttings can be made by combining equal parts of potting soil, perlite, and compost.
To optimize the growth of mint cuttings, it is important to provide bright, indirect light, consistent moisture, and well-draining soil with organic matter. By following these guidelines, you can ensure that your mint cuttings will thrive and produce healthy, flavorful leaves.
Common Challenges in Mint Propagation
Propagating mint cuttings is a relatively easy task, but there are a few challenges that you may encounter along the way. In this section, I will discuss some of the common challenges that you may face when propagating mint cuttings and how to overcome them.
Dealing with Pests and Diseases
Mint is generally a hardy plant, but it can still be susceptible to pests and diseases. One common problem that you may encounter is mint rust, which is a fungal disease that causes orange or yellow spots on the leaves. To prevent mint rust, make sure to keep the leaves dry and avoid watering the plant from above.
Another common pest that can affect mint is spider mites. These tiny pests can cause yellowing and wilting of the leaves. To prevent spider mites, make sure to keep the plant well-watered and spray it with a solution of neem oil and water.
Avoiding Common Mistakes – Propagating Mint Cuttings
One of the most common mistakes that people make when propagating mint cuttings is using waterlogged soil. Mint prefers well-draining soil, so make sure to use a potting mix that contains perlite or vermiculite to improve drainage.
Another mistake that people make is not giving the plant enough light. Mint needs at least 6 hours of sunlight per day, so make sure to place it in a sunny location or use artificial grow lights.
In conclusion, propagating mint cuttings is a simple and rewarding process, but it is important to be aware of the common challenges that you may encounter. By following the tips outlined in this section, you can ensure that your mint plants thrive and produce an abundance of fragrant leaves.
Advanced Tips and Techniques
As an experienced gardener, I have learned some advanced tips and techniques for propagating mint cuttings. In this section, I will share some of my insights to help you grow healthy and thriving mint plants.
Pruning for Healthier Plants – Propagating Mint Cuttings
One important technique for propagating mint cuttings is pruning. Pruning helps to promote healthier and bushier plants. When you prune your mint plants, it encourages the growth of new shoots and leaves, which can be used for propagating new plants.
To prune your mint plants, simply use a pair of sharp pruning shears and cut back the stems to just above a pair of leaves. This will encourage new growth and help to prevent your plants from becoming too leggy.
Using Greenhouses and Growth Boxes
Another advanced technique for propagating mint cuttings is using greenhouses or growth boxes. Greenhouses and growth boxes provide a controlled environment for your plants, which can help to promote faster and more successful growth.
To use a greenhouse or growth box for propagating mint cuttings, simply place your cuttings in a pot with soil or water and place them inside the greenhouse or growth box. Make sure to keep the environment warm and humid, and provide plenty of light.
By following these advanced tips and techniques for propagating mint cuttings, you can ensure that your plants grow healthy and strong. Whether you are a seasoned gardener or a beginner, these techniques can help you to achieve great results and enjoy fresh, flavorful mint in your garden.
Exploring Mint Varieties and Uses – Propagating Mint Cuttings
Different Mint Varieties
Mint is a versatile herb that comes in many different varieties, each with its unique fragrance and flavor. Some of the most popular mint varieties are peppermint, spearmint, and chocolate mint. Peppermint and spearmint are the most common types of mint used in cooking and herbal remedies, while chocolate mint is often used in desserts.
Other mint varieties include pineapple mint, apple mint, and ginger mint. Pineapple mint has a sweet, fruity aroma, while apple mint has a crisp, apple-like scent. Ginger mint has a spicy, ginger-like flavor and aroma.
Culinary and Medicinal Uses – Propagating Mint Cuttings
Mint is a popular herb used in both culinary and medicinal applications. In cooking, mint is often used to flavor dishes like salads, soups, and sauces. It pairs well with other herbs like rosemary and basil and adds a refreshing flavor to dishes.
Mint is also used in traditional medicine to treat a variety of ailments. Mint tea is a popular remedy for digestive issues, like bloating and indigestion. It can also be used to relieve headaches and reduce stress.
When propagating mint cuttings, it’s important to choose the right variety for your needs. Peppermint and spearmint are the most common types of mint used in cooking and herbal remedies, while other varieties like chocolate mint and pineapple mint are better suited for desserts and beverages.
Proper mint plant care is also essential for healthy growth and propagation. Mint prefers well-draining soil and partial shade, and it should be watered regularly to keep the soil moist. Pruning the plant regularly will also encourage new growth and help prevent the plant from becoming too woody.
Additional Resources – Propagating Mint Cuttings
If you want to learn more about propagating mint cuttings, there are plenty of resources available to help you. Here are a few that I recommend:
Step-by-Step Guides – Propagating Mint Cuttings
If you prefer a hands-on approach to learning, a step-by-step guide might be the best option for you. There are many free guides available online that can walk you through the process of propagating mint cuttings. One such guide is available at Get Busy Gardening. This guide provides clear and concise instructions for propagating mint cuttings, including information on rooting hormone, water propagation, and soil propagation.
Recommended Reading and Ebooks
If you prefer to learn through reading, there are many ebooks and other resources available that can help you become an expert in propagating mint cuttings. One such ebook is Herb Gardening for Beginners, which includes a chapter on propagating mint cuttings. This ebook provides detailed information on the best time to take cuttings, the types of soil to use, and how to care for your new plants.
When it comes to choosing a soil for your mint cuttings, it’s important to choose a peat-free multipurpose compost. Peat-based compost is not sustainable and can harm the environment. Multipurpose compost is a good choice because it contains a blend of nutrients that can help your mint cuttings grow strong and healthy.
In conclusion, propagating mint cuttings is a fun and rewarding activity that can help you grow your own fresh herbs at home. With the right resources and a little bit of patience, you can become an expert in herb gardening in no time.
Before You Go – Propagating Mint Cuttings
Propagating mint cuttings offers a simple, rewarding way to expand your herb garden. With just a few healthy stems, a clean cut, and the right growing conditions, you can multiply your mint supply and enjoy fresh leaves all season long.
Before you head back to the garden, remember that mint grows quickly and can spread aggressively. Consider planting it in containers or designated beds to keep it under control. Regular watering, good drainage, and plenty of sunlight will help your new cuttings thrive.
By practicing propagation, you not only save money but also ensure a steady supply of fresh, aromatic mint for teas, cooking, and natural remedies. With patience and care, your mint cuttings will transform into lush plants that bring flavor and fragrance to your garden.
Don’t forget to add theherbprof.com homepage to your favourites so you don’t miss out on future articles!
References – Propagating Mint Cuttings
Little Herb Encyclopedia, by Jack Ritchason; N.D., Woodland Publishing Incorporated, 1995
The Ultimate Healing System, Course Manual, Copyright 1985, Don Lepore
Planetary Herbology, Michael Tierra, C.A., N.D., Lotus Press, 1988
Handbook of Medicinal Herbs, by James A. Duke, Pub. CRP Second Edition 2007
The Complete Medicinal Herbal, by Penelope Ody, Published by Dorling Kindersley
Check the Following Articles
Pale Tomato Leaves: Causes and Solutions
How to Get Rid of Flies in Potted Plants?
Jade Leaves: Benefits In Traditional Chinese Medicine
Frequently Asked Questions – Propagating Mint Cuttings
What is the best method for propagating mint cuttings indoors?
The best method for propagating mint cuttings indoors is to use either water or soil. Both methods are easy and effective. If you choose to propagate in water, you will need to change the water every few days to prevent bacteria growth. If you choose to propagate in soil, make sure to use a well-draining potting mix and keep the soil moist but not waterlogged.
How can you successfully propagate mint cuttings in water?
To successfully propagate mint cuttings in water, take a 4-6 inch cutting from a healthy stem, cut just below a leaf node, and remove the leaves from the bottom half of the stem. Dip the cut end of the stem in rooting hormone to encourage root growth, then place the stem in a jar filled with water. Change the water every few days to prevent bacteria growth, and keep the jar in a warm, bright location but out of direct sunlight. Roots should start to form in about 2-3 weeks.
What are the steps to propagate mint cuttings in soil?
To propagate mint cuttings in soil, take a 4-6 inch cutting from a healthy stem, cut just below a leaf node, and remove the leaves from the bottom half of the stem. Dip the cut end of the stem in rooting hormone to encourage root growth, then plant the stem in a pot filled with well-draining potting mix. Water the soil thoroughly and keep it moist but not waterlogged. Place the pot in a warm, bright location but out of direct sunlight. Roots should start to form in about 2-3 weeks.
How long does it typically take for mint cuttings to root?
It typically takes 2-3 weeks for mint cuttings to root, but the time can vary depending on the method used and environmental conditions.
Can you propagate mint using stems from store-bought plants?
Yes, you can propagate mint using stems from store-bought plants. Just make sure the plant is healthy and free from any diseases or pests.
Why might mint cuttings not root in water, and how can this be remedied?
Mint cuttings may not root in water if the water is not changed frequently enough, if the water is too cold, or if the cutting is not healthy. To remedy this, make sure to change the water every few days, use room-temperature water, and make sure the cutting is healthy and free from any diseases or pests.