If you’ve ever enjoyed the deep, earthy taste of oyster mushrooms, you already know how delicious they are. Now picture growing them right at home. It’s simpler than you might expect, and the results are incredibly rewarding. Oyster mushrooms not only bring a gourmet flair to your dishes but also provide a fun and sustainable gardening project.
Benefits Of Growing Oyster Mushrooms
Growing oyster mushrooms offers numerous advantages for both beginners and seasoned cultivators. First, these mushrooms grow rapidly. In as little as two weeks, I can harvest fresh mushrooms after starting the cultivation process. That quick turnaround keeps the excitement high.
Second, oyster mushrooms require minimal space. They thrive in small areas, making them perfect for urban gardening or tiny backyards. I can even grow them inside using simple containers.
Third, these mushrooms are nutritious. They’re rich in protein, fiber, vitamins, and minerals. Adding them to meals enhances both flavor and health benefits. With low calories and high nutritional value, oyster mushrooms are a win-win for my diet.
Fourth, growing oyster mushrooms is eco-friendly. They break down organic waste like coffee grounds and straw, turning it into delicious mushrooms. This process helps reduce waste and supports sustainable living.
Fifth, cultivating these mushrooms can be cost-effective. Buying fresh mushrooms at the store adds up quickly. By growing my own, I save money while enjoying high-quality produce right at home.
Lastly, growing oyster mushrooms can be a fun hobby. It brings joy and satisfaction when I see the fruits of my labor. Plus, sharing the bounty with friends adds an element of community to my effort.
Summarizing, the benefits of growing oyster mushrooms include quick growth, space efficiency, nutrition, eco-friendliness, cost savings, and enjoyment. What more could I ask for?
Choosing The Right Oyster Mushroom Variety

Selecting the right oyster mushroom variety can impact your growing experience and the flavor of your harvest. Different varieties offer unique tastes and textures. I find that picking the right type simplifies the growing process and enhances the final dish.
Common Types Of Oyster Mushrooms
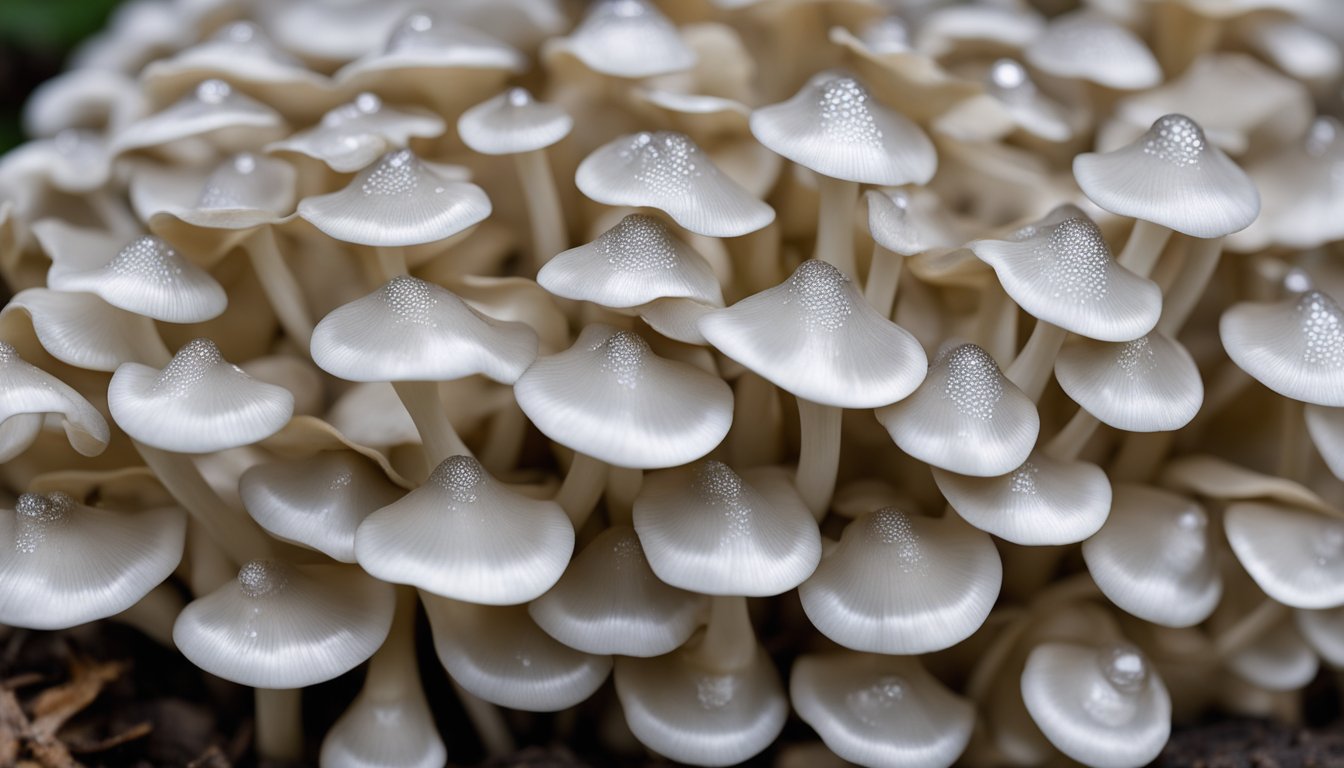
- Pleurotus ostreatus: This is the classic oyster mushroom, known for its mild flavor and tender texture. It usually appears in a beautiful fan shape and has a whitish to grayish color.
- Pleurotus djamor: The pink oyster mushroom stands out with its vibrant pink color. It has a sweet flavor, which makes it a great addition to stir-fries or salads.
- Pleurotus fulvus: These golden oyster mushrooms are not just pretty; they offer a nutty flavor and are perfect for enhancing the richness of dishes.
- Pleurotus eryngii: Known as the king oyster mushroom, this variety has a thick stem and a meaty texture. It’s excellent for grilling or sautéing.
- Pleurotus sapidus: This unique type has a distinct, slightly fishy flavor. It’s an exciting option for adventurous eaters looking to try something new.
Factors To Consider When Choosing
I always consider three main factors when selecting an oyster mushroom variety. First, assess your growing conditions. Some mushrooms thrive in cooler temperatures, while others love the warmth of a cozy garage.
Second, think about the flavor preferences. If you enjoy mild flavors, stick with Pleurotus ostreatus. For a bolder bite, the king oyster offers an impressive taste.
Finally, consider the culinary uses. If you want a versatile ingredient for various dishes, the classic oyster mushroom fits the bill. However, if you’re looking to impress guests, the pink oyster mushroom adds visual flair and a sweet twist.
Choosing the right variety makes all the difference. It transforms your home-growing experience and enhances your delightful mushroom feasts.
The Growing Environment
Creating the right environment is crucial for growing oyster mushrooms. These fungi thrive in specific conditions that promote healthy growth and robust flavor.
Ideal Temperature And Humidity
Oyster mushrooms prefer a temperature range between 60°F and 75°F. This range allows them to flourish. If it gets too cold or too hot, growth slows down or stops entirely. Humidity levels also play a vital role. A humidity level between 85% and 95% keeps the mushrooms hydrated, preventing them from drying out. Consider using a humidifier if you’re growing indoors. Remember, a happy mushroom is a juicy mushroom!
Cultivation Methods

Growing oyster mushrooms can occur through two main methods: spores and spawn. Both methods offer unique pathways to delicious harvests.
Growing From Spores
Starting with spores is like planting tiny seeds. I take a spore syringe, which contains millions of spores, and gently squirt it onto a substrate like straw or sawdust. That’s my base material where mushrooms grow. I can expect to wait a bit longer for the mushrooms to appear, but patience pays off in flavor. One fun fact? Each spore can produce five to ten mushrooms.
A crucial step involves covering the substrate with a plastic film to hold in moisture. Humidity becomes my best friend during this process. Keeping it humid helps the spores germinate faster. A small fan can help circulate air without drying things out.
Growing From Spawn
Using spawn is another great method for cultivating oyster mushrooms. Spawn consists of inoculated substrate containing mycelium. Mycelium is the root structure of the mushroom. With spawn, I can skip the waiting game that comes with spores.
The process is straightforward. I simply mix spawn into prepared substrate, like straw or coffee grounds, and place it in a container. After that, I cover the container with a breathable lid or cloth. Within a week, I can see white mycelium spreading throughout the substrate.
I keep the environment humid and warm to encourage growth. In about two weeks, I can expect to see my mushrooms. That’s a lot quicker than waiting for spores. Using spawn can result in a larger crop, and it’s often less tricky for beginners. Plus, mushroom lovers often find that the flavor is just as robust.
Both methods, growing from spores and growing from spawn, create the potential for delicious homegrown oyster mushrooms. Each has its charm and can suit different preferences. Whether I go the spore route or use spawn, I’m in for a satisfying culinary adventure.
Maintenance And Care
Caring for oyster mushrooms ensures a healthy and bountiful harvest. Regular attention to watering and nutrients is key.
Watering And Nutrient Requirements
I water oyster mushrooms carefully. They thrive on moisture, so keeping the substrate damp is essential. Overwatering can lead to problems while letting them dry out affects growth. I mist the growing area daily, targeting humidity levels between 85% and 95%.
Nutrients also matter. Oyster mushrooms enjoy a substrate rich in organic matter. I usually choose straw or sawdust mixed with wheat bran. Adding supplements like coffee grounds can boost nutrition too. Balance is crucial; too much organic material can inhibit growth.
Pest And Disease Management
I keep a close watch for pests. Common culprits include flies and mites, so I act quickly. A simple soap-and-water spray often does the trick. Maintaining cleanliness around the growing area helps keep pests at bay.
Diseases can appear, particularly if the environment isn’t right. Fungal infections may develop under too much moisture. I ensure good airflow to prevent issues. If I spot mold, I remove it immediately. Taking these steps can keep my mushroom patch healthy and productive.
With proper maintenance and care, oyster mushrooms flourish, bringing tasty rewards to my kitchen.
Harvesting Techniques

Harvesting oyster mushrooms is a rewarding step in the growing process. It’s essential to pick them at the right time for optimal flavor and texture. When the caps begin to flatten, they’re ready for harvest. This usually occurs roughly two weeks after you see the first signs of growth.
For maximum freshness, use a sharp knife to cut the mushrooms at the base of the stem. Snapping them off can damage the mycelium, harming future yields. Again, it’s all about keeping the little guys healthy for that second wave of tasty harvest.
After harvesting, place the mushrooms in a breathable bag. Paper bags work great, letting them breathe without trapping moisture. Avoid plastic bags as they can cause condensation, leading to a mushy mess. Store your harvested mushrooms in a cool, dark place. They can stay fresh for several days this way.
I enjoy sharing my harvest with friends and family. It adds to the fun, and the mushrooms always spark some tasty recipe discussions. Plus, gifting homegrown mushrooms makes everyone feel special. If you grow more than you can eat, consider drying or freezing extra mushrooms for later enjoyment.
Before You Go – Growing Oyster Mushrooms
Growing oyster mushrooms at home has been one of the most rewarding experiences I’ve had. From the rich flavors they add to my dishes to the satisfaction of nurturing them from spores or spawn, it’s truly fulfilling. The minimal space they require makes it easy for anyone, even in urban settings, to enjoy this sustainable hobby.
With just a little care and attention, the rapid growth and nutritional benefits of these mushrooms can transform my cooking and contribute to a greener lifestyle. Plus, sharing my harvest with friends and family adds a special touch to this wonderful journey. I can’t recommend starting your own oyster mushroom garden enough, it’s a delightful adventure that yields delicious rewards. Don’t forget to add The Herb Prof to your favorites so you don’t miss out on future articles.
References – Growing Oyster Mushrooms
Little Herb Encyclopedia, by Jack Ritchason; N.D., Woodland Publishing Incorporated, 1995
The Ultimate Healing System, Course Manual, Copyright 1985, Don Lepore
Planetary Herbology, Michael Tierra, C.A., N.D., Lotus Press, 1988
Handbook of Medicinal Herbs, by James A. Duke, Pub. CRP Second Edition 2007
The Complete Medicinal Herbal, by Penelope Ody, Published by Dorling Kindersley
Check the Following Articles
Zarbee’s Elderberry Gummy Daily Immune Support Review
A Beginner’s Guide to Horticulture Propagation Techniques
Understanding Light Cycles in Grow Kits
Heucherella Plant Information: The Mega Guide
Frequently Asked Questions – Growing Oyster Mushrooms
What are oyster mushrooms, and why should I grow them at home?
Oyster mushrooms are a delicious and nutritious type of fungi known for their rich flavor and gourmet appeal. Growing them at home is rewarding and sustainable, requiring minimal space and allowing you to harvest in as little as two weeks. They also provide nutritional benefits, including protein, fiber, vitamins, and minerals. Plus, cultivating them can reduce organic waste and save money compared to buying them at the store.
How do I choose the right variety of oyster mushrooms?
When selecting an oyster mushroom variety, consider three key factors: growing conditions, flavor preferences, and culinary uses. Common varieties include Pleurotus ostreatus (classic), Pleurotus djamor (pink), Pleurotus fulvus (golden), Pleurotus eryngii (king), and Pleurotus sapidus. Choosing the right variety simplifies the growing process and enhances your cooking experience.
What growing conditions do oyster mushrooms need?
Oyster mushrooms thrive in temperatures between 60°F to 75°F and require humidity levels of 85% to 95% for optimal growth. Use a humidifier to maintain moisture, as proper conditions lead to healthier mushrooms. Good airflow is also important to prevent fungal infections.
What are the two main methods for growing oyster mushrooms?
Oyster mushrooms can be grown from spores or spawn. Growing from spores uses a spore syringe to inoculate a substrate, which takes longer to produce mushrooms. On the other hand, using spawn provides a quicker growing process. Mixing spawn with prepared substrate results in harvest-ready mushrooms in about two weeks.
How do I maintain my oyster mushrooms for a bountiful harvest?
To grow healthy oyster mushrooms, keep the substrate damp without overwatering. Mist the area daily and use a nutrient-rich substrate like straw or sawdust mixed with wheat bran. Monitor for pests and maintain cleanliness, ensuring good airflow to prevent infections.
When is the best time to harvest oyster mushrooms?
Harvest oyster mushrooms when their caps begin to flatten, usually around two weeks after growth starts. Use a sharp knife to cut them at the base to avoid damaging the mycelium. Proper timing enhances the flavor and texture of your dishes.
How should I store my harvested oyster mushrooms?
After harvesting, store oyster mushrooms in breathable paper bags placed in a cool, dark area to maintain freshness. If you have excess mushrooms, you can preserve them by drying or freezing them for later use, ensuring you enjoy your harvest long after picking.