Growing Russet potatoes is a rewarding experience that can provide you with a bountiful harvest of delicious and nutritious spuds. Russet potatoes are one of the most popular potato varieties in the United States, known for their oblong shape, rough brown skin, and white flesh. They are versatile and can be used for a variety of dishes, from baked potatoes to French fries.
To grow Russet potatoes, you will need to start with high-quality seed potatoes. These can be purchased from a reputable supplier or saved from your own previous harvest. Once you have your seed potatoes, you will need to prepare a suitable planting area.
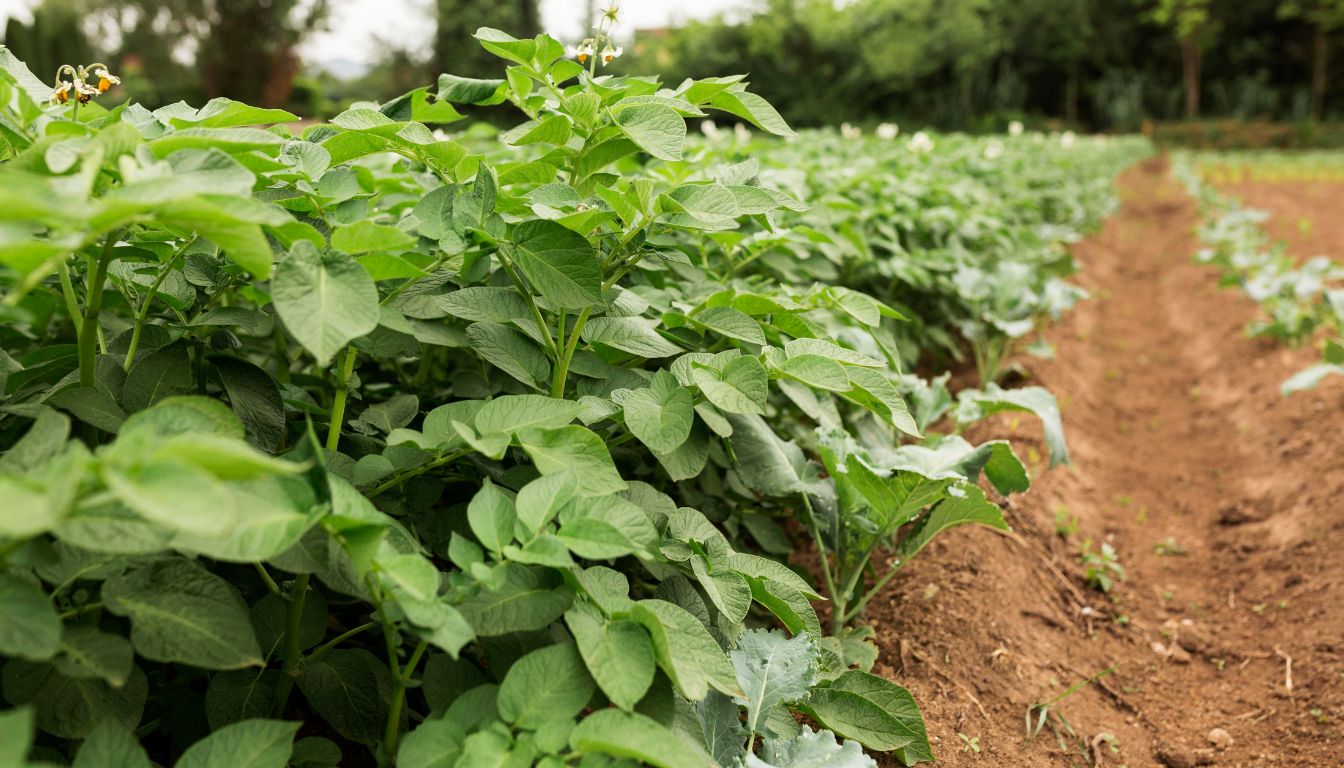
Russet potatoes prefer loose, well-drained soil that is rich in organic matter. They also require plenty of sunlight and regular watering. It is important to space your seed potatoes properly, as overcrowding can lead to smaller yields.
Understanding Russet Potatoes – Growing Russet Potatoes
I find Russet potatoes to be one of the most versatile and delicious varieties out there. In this section, I’ll go over the characteristics and varieties of Russet potatoes to help you understand why they’re such a great choice for your garden.
Characteristics of Russet Potatoes
Russet potatoes are known for their thick, rough skin and white flesh. They’re also high in starch, which makes them perfect for baking, frying, and mashing. The high starch content gives them a fluffy texture when cooked, which is why they’re often used for making baked potatoes or French fries.
One thing to keep in mind when cooking with Russet potatoes is that their skin is thicker than that of other potato varieties.
This means that you’ll need to scrub them well before cooking to remove any dirt or debris. However, the thick skin also means that Russet potatoes are more resistant to damage and bruising, which makes them a great choice for storage.
Varieties of Russet Potatoes
There are several different varieties of Russet potatoes, each with its own unique characteristics. The most common variety is the Russet Burbank, which is the potato that’s typically used for making French fries. This variety is known for its long, oblong shape and thick skin.
Another popular variety is the Russet Norkotah, which has a slightly thinner skin than the Burbank. The Norkotah is also a bit more oval in shape and has a slightly sweeter flavor than the Burbank. If you’re looking for a Russet potato that’s a bit less starchy, you might want to try the Russet Nugget. This variety has a lower starch content than other Russet potatoes and a slightly nutty flavor.
Selecting Seed Potatoes – Growing Russet Potatoes
Selecting the right seed potatoes is crucial to ensure a healthy and productive crop. In this section, I will discuss the two important aspects of selecting seed potatoes: certified seed potatoes and preparing seed potatoes for planting.
Certified Seed Potatoes
When selecting seed potatoes, it is important to choose certified seed potatoes. These are potatoes that have been certified by a government agency as disease-free and have been inspected to ensure they are true to their variety.
Certified seed potatoes are more expensive than regular potatoes, but they are worth the cost as they are less likely to carry diseases that can harm your crop.
When purchasing certified seed potatoes, make sure to choose ones that are suited to your growing region and climate. Different varieties of potatoes have different growing requirements, so it is important to choose a variety that will grow well in your area.
Preparing Seed Potatoes for Planting
Once you have selected your seed potatoes, it is important to prepare them for planting. This process is called chitting, and it involves allowing the potatoes to sprout before planting.
To chit your seed potatoes, place them in a cool, dry, and well-lit area with the eyes facing up. The eyes are the small indentations on the surface of the potato where the sprouts will emerge. After a few weeks, the potatoes will begin to sprout. Once the sprouts are about 1/2 inch long, they are ready for planting.
Before planting, make sure to inspect your seed potatoes for any signs of disease or damage. Discard any potatoes that are soft, wrinkled, or have black spots. Only plant healthy seed potatoes to ensure a healthy and productive crop.
Preparing the Soil – Growing Russet Potatoes
I know that preparing the soil is the most crucial step in growing healthy and productive russet potatoes. In this section, I will explain how to prepare the soil for planting russet potatoes.
Soil Composition and Amendments
Russet potatoes require well-drained soil that is rich in organic matter. If your soil is heavy or clay-like, you can amend it by adding compost or well-rotted manure. These amendments will help improve soil structure, increase soil fertility, and provide the necessary nutrients for your potato plants to grow.
It is important to note that adding too much nitrogen-rich fertilizer can result in excessive vegetative growth and low yields. Therefore, it is recommended to use a balanced fertilizer with equal amounts of nitrogen, phosphorus, and potassium.
Soil Temperature and pH Levels
Russet potatoes grow best in soil with a slightly acidic pH level between 5.0 and 6.0. You can test your soil’s pH level using a soil testing kit, which can be purchased at your local garden center or online.
It is also important to ensure that the soil temperature is suitable for planting. The ideal soil temperature for planting russet potatoes is between 50°F and 65°F. If the soil temperature is too cold, the potatoes may not sprout, and if it is too warm, the tubers may rot before they have a chance to grow.
Planting Russet Potatoes – Growing Russet Potatoes
Growing russet potatoes is a rewarding experience that can provide you with a bountiful harvest. To get started, you’ll need to plant your seed potatoes. In this section, I’ll cover the basics of planting russet potatoes.
Planting Time and Techniques
The best time to plant russet potatoes is in the spring after the threat of frost has passed and the soil temperature has reached around 50 to 65°F (10 to 18°C). Planting too early in cold, wet soil can lead to poor germination and potential rotting of the seed potatoes.
To plant your seed potatoes, you’ll need to dig a planting trench about 6 to 7 inches deep. When planting potatoes directly in the garden, pile the excess soil from the groove next to the potato row. For russet potatoes grown in containers, store the soil in plastic bags nearby, since moving them far away can be difficult because of their weight.
Spacing and Depth
When planting your seed potatoes, it’s important to space them properly to ensure good growth. The recommended spacing for russet potatoes is 12 to 15 inches apart in rows that are 30 to 36 inches apart. This will give the plants enough room to grow and produce a good yield.
Once you’ve spaced your seed potatoes, it’s time to plant them. Place each seed potato in the trench with the sprouts facing up. Cover the seed potatoes with soil, leaving about 4 inches of soil above the seed potatoes. As the potato plant grows, you’ll need to add more soil to the trench to keep the developing tubers covered.
Caring for Potato Plants – Growing Russet Potatoes
Growing russet potatoes is not just about planting them and waiting for them to grow. It also involves proper care and maintenance to ensure a healthy and bountiful harvest. In this section, I will discuss two important aspects of potato plant care: watering and moisture control, and fertilization and nutrient management.
Watering and Moisture Control
Potatoes require consistent moisture to grow properly, but overwatering can lead to rot and disease. Therefore, it is important to find the right balance when watering your potato plants.
One way to ensure proper moisture control is by using drip irrigation or a soaker hose. These methods provide a slow, steady supply of water directly to the roots, which helps prevent overwatering and ensures that the plants receive the right amount of moisture.
Another important aspect of moisture control is hilling. Hilling involves mounding soil around the base of the plant, which helps to prevent moisture loss and encourages root growth. It also helps to prevent the potatoes from being exposed to sunlight, which can cause them to turn green and become toxic.
Fertilization and Nutrient Management
Potatoes require a balanced supply of nutrients, including nitrogen, phosphorus, and potassium, to grow properly. Fertilization should be done at the time of planting and throughout the growing season.
One way to ensure proper fertilization is by using a complete fertilizer that contains all three nutrients. Another option is to use organic fertilizers, such as compost or manure, which provide a slow-release supply of nutrients. It is important to avoid over-fertilizing, as this can lead to excessive vegetative growth and poor-quality potatoes.
A soil test can help determine the right amount of fertilizer to use. Additionally, make sure to avoid using high-nitrogen fertilizers, as this can lead to excessive foliage growth at the expense of tuber development.
Protecting Against Pests and Diseases – Growing Russet Potatoes
Growing russet potatoes requires protecting them from pests and diseases that can harm the plants and reduce yield. In this section, I will discuss common potato pests and ways to prevent and control diseases.
Common Potato Pests
Potato pests can cause serious damage to the plants, including eating the leaves and tubers. The following are some of the most common potato pests and ways to control them:
- Aphids: These small insects suck the sap from the leaves and stems, causing the leaves to curl and distort. To control aphids, spray the plants with insecticidal soap or use companion planting with plants that attract beneficial insects that prey on aphids.
- Potato beetles: These beetles eat the leaves of potato plants, causing significant damage. To control potato beetles, handpick them off the plants or use row covers to prevent them from reaching the plants.
- Leafhoppers: These insects suck the sap from the leaves, causing the leaves to turn yellow and die. To control leafhoppers, use insecticidal soap or neem oil.
- Cutworms: These caterpillars feed on the stems of young potato plants, causing them to wilt and die. To control cutworms, use row covers or sprinkle diatomaceous earth around the plants.
Disease Prevention and Control
Potato diseases can cause significant damage to the plants, reducing yield and quality. The following are some of the most common potato diseases and ways to prevent and control them:
- Blight: Blight is a fungal disease that causes the leaves to turn brown and the tubers to rot. To prevent blight, practice crop rotation and avoid planting potatoes in the same area for more than two years. Use fungicides like mancozeb or chlorothalonil to control blight.
- Potato scab: Potato scab is a bacterial disease that causes scabby lesions on the tubers. To prevent potato scab, maintain soil pH between 5.2 and 5.5 and avoid planting potatoes in alkaline soil. Use organic pesticides like copper sulfate to control potato scab.
- Verticillium wilt: Verticillium wilt is a fungal disease that causes the leaves to wilt and the tubers to rot. To prevent verticillium wilt, practice crop rotation and avoid planting potatoes in the same area for more than two years. Use fungicides like azoxystrobin or propiconazole to control verticillium wilt.
Harvesting and Storing – Growing Russet Potatoes

As a russet potato farmer, I know that harvesting and storing practices are crucial to ensure a good yield and long shelf life. Here are some tips on how to harvest and store russet potatoes.
When and How to Harvest
Russet potatoes are typically ready for harvest after 105-120 days of planting. The leaves of the potato plant will start to yellow and wilt, indicating that the potatoes are mature and ready to be harvested.
To harvest, use a spading fork to gently loosen the soil around the plant. Be careful not to damage the potatoes as you lift them out of the soil. It is best to harvest russet potatoes on a dry day when the soil is not too moist. This will help prevent the potatoes from rotting during storage.
After harvesting, allow the potatoes to dry in the sun for a few hours. This will help to toughen the skin and protect it from bruising during storage.
Storing Techniques
Proper storage is essential to ensure that your russet potatoes last for several months without sprouting or rotting. Store your potatoes in a cool, dry place, away from direct sunlight. A temperature range of 45-50°F (7-10°C) is ideal for storing potatoes.
Avoid storing potatoes in the refrigerator, as this can cause them to become sweet and change their texture. One effective way to store russet potatoes is to use a root cellar or a cool, dark basement.
Store potatoes in a cardboard box or a burlap sack, but punch holes in the container to allow air circulation. Another option is to store potatoes in a mesh bag or a wire basket, which provides good airflow and prevents the potatoes from becoming too moist.
Alternative Growing Methods – Growing Russet Potatoes
If you don’t have enough space in your garden, or if you want to try a different method to grow russet potatoes, there are some alternative growing methods you can use. In this section, I’ll cover two popular methods that can be used to grow russet potatoes: container and raised bed gardening, and hydroponics and aeroponics.
Growing Russet Potatoes – Container and Raised Bed Gardening
Container and raised bed gardening are great options for growing russet potatoes. Container gardening involves using containers such as pots, buckets, or bags to grow plants. Raised bed gardening involves creating a garden bed that is higher than the surrounding soil.
Both of these methods are great for growing russet potatoes because they allow you to control the soil, water, and nutrients that the plants receive. To grow russet potatoes in containers or raised beds, you should follow these steps:
- Choose a container or raised bed that is at least 18 inches deep and wide enough to accommodate the number of potatoes you want to grow.
- Fill the container or raised bed with a well-draining soil mix that has a pH of 4.5 to 5.5.
- Plant your seed potatoes about 6 inches apart and cover them with 3 to 4 inches of soil.
- Water the soil until it is moist but not waterlogged.
- As the plants grow, add more soil around the stems to keep the tubers covered.
- Harvest your potatoes when the plants start to die back.
Growing Russet Potatoes – Hydroponics and Aeroponics
Hydroponics and aeroponics are soil-free growing methods that gardeners increasingly use to cultivate vegetables, including russet potatoes. In a hydroponic system, plants grow in a nutrient-rich water solution, while an aeroponic system sustains plants in a misty environment. To grow russet potatoes with either method, follow these steps:
- Choose a hydroponic or aeroponic system that is designed for growing potatoes.
- Plant your seed potatoes in the system and make sure they are covered with the nutrient-rich solution or mist.
- Monitor the pH and nutrient levels of the solution or mist and adjust them as needed.
- Provide adequate lighting for the plants.
- Harvest your potatoes when they are ready.
Sustainability and Organic Practices – Growing Russet Potatoes
As a potato grower, sustainability and organic practices are essential for me to ensure that I am producing quality potatoes while minimizing the impact on the environment.
Organic Fertilizers and Compost
Organic material such as compost, manure, and cover crops can be used to improve soil fertility and structure. Compost is an excellent source of nutrients and organic matter, which can help retain moisture in the soil. Adding compost to the soil before planting can also help suppress diseases and pests.
In addition to compost, I also use organic fertilizers such as bone meal, blood meal, and fish emulsion. These fertilizers provide a slow-release source of nutrients that are easily absorbed by the plants. Using organic fertilizers and compost is a sustainable practice that helps reduce the use of synthetic fertilizers that can harm the environment.
Natural Pest and Weed Control
Controlling pests and weeds without the use of synthetic pesticides is essential for organic potato production. Companion planting is a great way to naturally control pests and improve soil health. Companion plants such as marigolds, basil, and garlic can help repel pests and attract beneficial insects.
Weed control is also important in potato production. Mulching with straw or hay can help suppress weeds and conserve moisture in the soil. Hand weeding and hoeing are also effective methods for controlling weeds.
In addition to companion planting and mulching, I also use organic pesticides such as neem oil and insecticidal soap. These pesticides are derived from natural sources and are less harmful to the environment than synthetic pesticides.
Before You Go – Growing Russet Potatoes

Russet potatoes reward careful growers with hearty harvests, but success depends on consistent attention. Keep soil loose, nutrient-rich, and well-drained, and remember to water regularly without over-saturating. Hill the soil around your plants as they grow to protect developing tubers and encourage larger yields.
Stay alert for pests and diseases, and act quickly with natural or chemical treatments when needed. Whether you grow them in garden rows or containers, proper spacing and sunlight will help your russets thrive. With patience and care, you’ll enjoy a bountiful supply of one of the most versatile staples in the kitchen.
Don’t forget to add theherbprof.com homepage to your favourites so you don’t miss out on future articles!
References – Growing Russet Potatoes
Little Herb Encyclopedia, by Jack Ritchason; N.D., Woodland Publishing Incorporated, 1995
The Ultimate Healing System, Course Manual, Copyright 1985, Don Lepore
Planetary Herbology, Michael Tierra, C.A., N.D., Lotus Press, 1988
Handbook of Medicinal Herbs, by James A. Duke, Pub. CRP Second Edition 2007
The Complete Medicinal Herbal, by Penelope Ody, Published by Dorling Kindersley
Check the Following Articles
Grow Cucumbers Upside Down: A Beginner’s Guide
Lots of Tomatoes but Not Ripening: Reasons and Solutions
How to Grow and Care for Lemongrass
Pepper Plant Insects: Identification and Control
Frequently Asked Questions – Growing Russet Potatoes
What is the ideal soil composition for planting russet potatoes?
To grow russet potatoes successfully, use well-draining soil with a pH between 5.0 and 7.0. Choose loose, loamy soil rich in organic matter. Before planting, mix in compost or well-rotted manure to improve soil quality.
Can you grow a healthy russet potato plant from a store-bought potato?
You can grow a healthy russet potato plant from a store-bought potato if you select one without signs of disease or rot. Look for potatoes with several “eyes” or sprouts. Cut the potato into pieces with at least one eye each, and let them dry for a day or two before planting.
What are the best practices for hilling russet potatoes during growth?
To support tuber formation, mound soil around the base of the plant as it grows. Begin hilling when the plants reach about 6 inches tall. Cover the stem with soil, leaving only the top few leaves exposed. Repeat every 2–3 weeks until the plants grow to about 12 inches tall.
How many potatoes can typically be harvested from a single russet plant?
A single russet plant typically produces 5–10 potatoes, depending on the plant’s size, growing conditions, and variety. With ideal care, you may harvest even more.
What are the signs that russet potatoes are ready for harvest?
Look for yellowing and dying foliage about 2–3 weeks after the final hilling. Check that the potato skins feel firm and thick. Wait until the soil dries out before harvesting to avoid damaging the tubers.
Are there any specific container sizes recommended for growing russet potatoes indoors?
Look for yellowing and dying foliage about 2–3 weeks after the final hilling. Check that the potato skins feel firm and thick. Wait until the soil dries out before harvesting to avoid damaging the tubers.