
Paul Johnston is the founder and master herbalist of The Herb Prof, with decades of clinical experience in naturopathic medicine, herbal remedies, detoxification and holistic wellness. After overcoming his own serious health challenges, he now dedicates himself to helping others reclaim their health naturally.
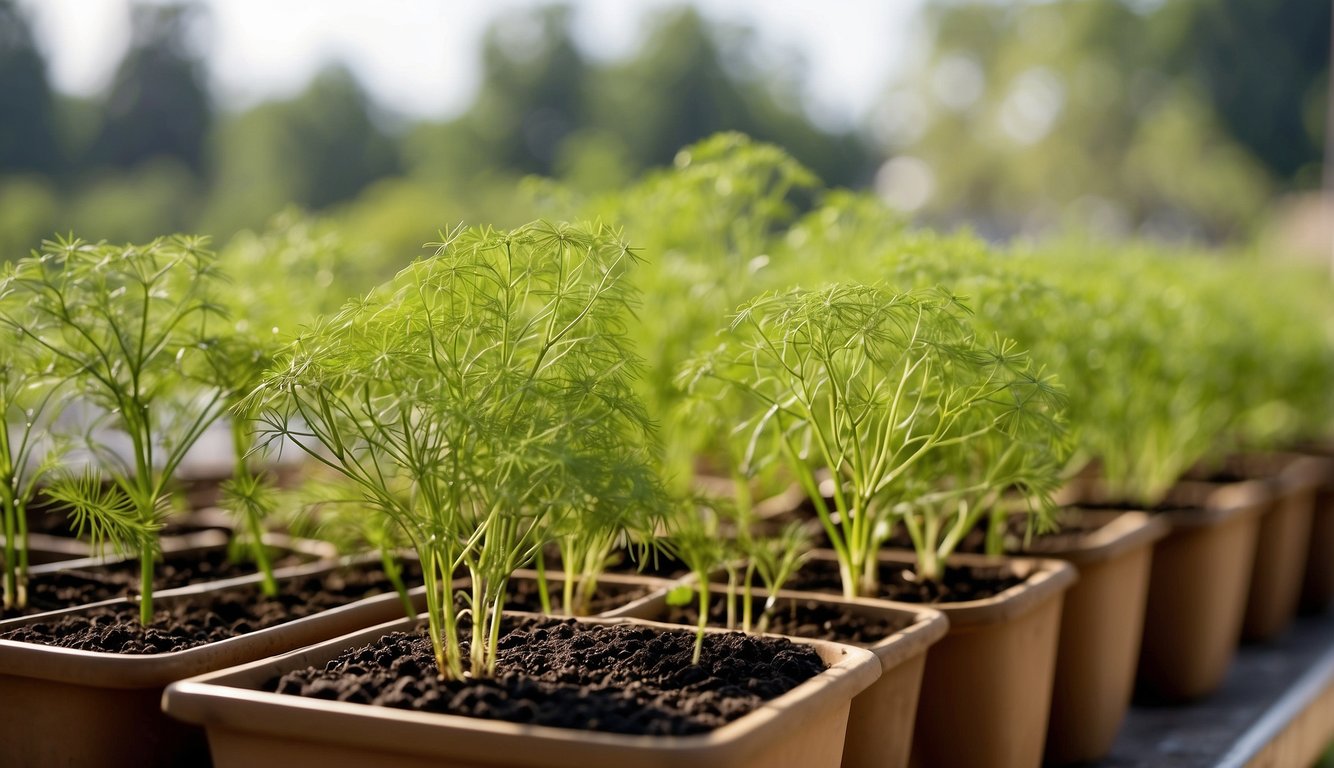
Planting dill in pots is an excellent way to enjoy this popular herb even in limited spaces. Dill is a versatile plant that can be used in a wide range of dishes, from pickles and soups to fresh salads. Growing dill in containers is simple and only takes a few easy steps.
To start, choose a pot that is at least 12 inches deep and has good drainage. Fill the pot with a well-draining potting mix, leaving about an inch of space at the top. Plant the dill seeds about a quarter of an inch deep and cover them with soil. Water the soil well and place the pot in a sunny location.
Dill is a hardy herb that can grow in a variety of conditions, but it prefers well-draining soil and full sun. Keep the soil moist but not waterlogged, and fertilize the plant every two weeks with a balanced fertilizer. With proper care, your dill plant will thrive and provide you with fresh herbs all season long.
Choosing the Right Pot
When it comes to planting dill in pots, choosing the right pot is crucial for the plant’s growth and health. In this section, I will discuss the two main factors to consider when selecting a pot for your dill plant: pot size and material, and drainage considerations.
Pot Size and Material
Dill plants have long taproots, so it’s important to choose a pot that is deep enough to accommodate them. A pot that is at least 12 inches in diameter and 12 inches deep is ideal for growing dill. Additionally, the pot should be made of a porous material like clay or terracotta, which allows for proper airflow and drainage.
Drainage Considerations
Proper drainage is essential for dill plants, as they are susceptible to root rot if they are overwatered or if the soil does not drain well. To ensure proper drainage, choose a pot with drainage holes in the bottom. If your chosen pot does not have drainage holes, you can drill them yourself or place a layer of gravel or sand at the bottom of the pot to help with drainage.
In summary, when choosing a pot for your dill plant, make sure it is at least 12 inches in diameter and made of a porous material like clay or terracotta. Additionally, ensure that the pot has proper drainage by either choosing one with drainage holes or adding a layer of gravel or sand to the bottom. By following these guidelines, you can ensure that your dill plant has the best chance of thriving in a pot.
Selecting Soil and Fertilizer
Soil Composition
When planting dill in pots, it is important to choose the right soil composition. Dill prefers well-draining soil that is rich in organic matter. A good potting mix should provide the necessary nutrients and moisture retention that dill requires to grow well. Loamy soil is the best for growing dill in pots as it provides good drainage and aeration.
The pH level of the soil is also important. Dill prefers slightly acidic soil with a pH range of 6.0 to 7.5. You can test the pH level of the soil using a soil pH tester. If the soil is too acidic, you can add lime to raise the pH level. If the soil is too alkaline, you can add sulfur to lower the pH level.
Fertilizer Types and Usage
Fertilizers are important for providing the necessary nutrients that dill requires to grow well. When selecting a fertilizer, it is important to choose one that is high in nitrogen as this is the primary nutrient that dill needs. You can use either organic or synthetic fertilizers.
Organic fertilizers are a good choice for those who want to avoid using synthetic fertilizers. They are made from natural materials such as compost, manure, and bone meal. Organic fertilizers release nutrients slowly over time, providing a steady supply of nutrients to the plant.
Synthetic fertilizers are a good choice for those who want a quick and easy way to fertilize their plants. They are made from chemical compounds and provide a quick boost of nutrients to the plant. However, synthetic fertilizers can be harmful to the environment if not used properly.
When using fertilizers, it is important to follow the instructions on the package. Over-fertilizing can be harmful to the plant and can lead to nutrient burn. Generally, you should fertilize dill every 2-3 weeks during the growing season.
Planting Dill Seeds and Seedlings

When it comes to planting dill in pots, there are two ways to get started: planting seeds or transplanting seedlings. Both methods are easy and can be done successfully with a little bit of care.
Germinating Seeds
If you decide to plant dill seeds, the first step is to germinate them. Dill seeds can be slow to germinate, so it’s important to be patient. Here’s how to get started:
- Fill a small pot with potting soil and water it until it’s moist but not soggy.
- Sprinkle dill seeds on top of the soil, spacing them about an inch apart.
- Cover the seeds with a thin layer of soil, about 1/8 inch deep.
- Water the soil again, being careful not to disturb the seeds.
- Place the pot in a warm, sunny spot.
- Keep the soil moist by misting it with water as needed.
In about 10 to 14 days, you should see the dill seeds sprout. As the seedlings grow, thin them out so that each plant has enough space to grow.
Transplanting Seedlings
If you prefer to start with seedlings, you can purchase them from a nursery or start your own from seeds. Here’s how to transplant dill seedlings:
- Fill a larger pot with potting soil and water it until it’s moist but not soggy.
- Dig a small hole in the soil, deep enough to accommodate the roots of the seedling.
- Carefully remove the dill seedling from its original pot, being careful not to damage the roots.
- Place the seedling in the hole and gently pack soil around it.
- Water the soil again, being careful not to overwater.
It’s important to keep the soil moist but not waterlogged. Dill seedlings can be sensitive to overwatering, so it’s important to be careful. With proper care, your dill seedlings will grow quickly and be ready to harvest in just a few weeks.
Dill Plant Care
Growing dill in pots is an easy and rewarding experience. The plant is relatively low maintenance, but it does require some care to thrive. In this section, I will cover the watering requirements, sunlight and temperature needs, as well as pruning and maintenance tips for your potted dill plant.
Watering Requirements
Proper watering is crucial for the growth and health of your dill plant. Overwatering can lead to soggy soil, which can cause root rot, while underwatering can cause the plant to wilt and die. To avoid these issues, water your dill plant when the top 1-2 inches of soil are dry.
It is important to note that dill prefers moist soil, but not soggy soil. Therefore, make sure to water your plant thoroughly, but do not leave it sitting in a saucer of water.
Sunlight and Temperature
Dill is a sun-loving plant that requires at least 6-8 hours of full sun per day to thrive. Therefore, it is best to place your potted dill plant in a location that receives direct sunlight.
In terms of temperature, dill prefers warm temperatures above 60 degrees Fahrenheit (15 degrees Celsius) to sprout. Once the plant has sprouted, it can tolerate cooler temperatures. However, it is important to avoid exposing your dill plant to frost.
Pruning and Maintenance
Pruning your dill plant is essential to encourage healthy growth and prevent it from becoming too leggy. To prune your plant, simply pinch off the top growth when it reaches 12 inches in height. This will encourage the plant to branch out and produce more foliage.
In terms of maintenance, keep an eye out for any signs of pests or diseases, such as yellowing leaves or wilting. If you notice any issues, remove the affected leaves or treat the plant with an appropriate pesticide or fungicide.
Overall, with proper care and attention, your potted dill plant will thrive and provide you with a bountiful harvest of flavorful and aromatic leaves.
Pest and Disease Management
As a responsible gardener, I always take measures to prevent pests and diseases from harming my plants. Here are some tips on how to manage pests and diseases when growing dill in pots.
Common Pests
Some common pests that can attack dill plants are aphids, caterpillars, and hornworms. Aphids are small insects that suck the sap from the plant, causing the leaves to curl and turn yellow. Caterpillars and hornworms, on the other hand, can eat the leaves and stems of the plant, causing significant damage.
To manage these pests, I regularly inspect my dill plants for any signs of infestation. If I spot any aphids, I use a strong jet of water to wash them off the plant. For caterpillars and hornworms, I pick them off by hand and dispose of them.
Disease Prevention
Preventing diseases is also crucial to keep your dill plants healthy. One way to prevent diseases is to avoid overwatering your plants. Dill plants prefer well-draining soil, so make sure the pot has drainage holes to prevent water from accumulating.
Another way to prevent diseases is to use beneficial insects. Ladybugs, lacewings, and parasitic wasps are natural predators that can help control pests like aphids and caterpillars. You can attract these beneficial insects to your garden by planting flowers like marigolds, daisies, and sunflowers.
Managing pests and diseases is an essential part of growing dill in pots. By following these tips, you can prevent pests and diseases from harming your plants and enjoy a healthy harvest of fresh dill.
Harvesting and Utilizing Dill – Planting Dill in Pots

When and How to Harvest
When it comes to harvesting dill, timing is everything. You can start harvesting dill leaves as soon as the plant reaches about 8 inches in height. However, it is important to note that the flavor of dill is at its peak just before the plant flowers. So, if you want to get the most flavor out of your dill, harvest it just before the flowers appear.
To harvest dill, use sharp scissors or garden shears to cut the foliage. Be sure to cut the leaves close to the stem, but leave enough foliage on the plant so that it can continue to grow. You can also harvest the flowers and seeds of the dill plant. Simply cut the flower heads off the plant when they begin to turn brown and dry them in a warm, dry place. Once the flowers have dried, you can shake the seeds out of the flower heads and store them in an airtight container.
Storing and Preserving Dill – Planting Dill in Pots
Fresh dill can be stored in the refrigerator for up to a week. To store dill, wrap it in a damp paper towel and place it in a plastic bag. You can also freeze dill for later use. To freeze dill, chop the leaves and place them in an ice cube tray. Fill each compartment with water and freeze. Once the dill cubes are frozen, you can store them in a freezer-safe container.
Dill is also a popular herb for pickling. To make dill pickles, simply add fresh dill leaves to your pickling jar along with cucumbers, vinegar, and other spices. The dill leaves will infuse the pickles with their unique flavor.
Cooking with Dill
Dill is a versatile herb that can be used in a variety of dishes. Its fresh, tangy flavor pairs well with fish dishes, soups, and salads. You can also use dill to flavor sauces and dressings.
When cooking with dill, it is important to remember that its flavor can be overpowering if used in large quantities. Start with a small amount and add more as needed. Dill can be used fresh or dried, but fresh dill is always best for maximum flavor.
Understanding Dill Varieties – Planting Dill in Pots
Dill is a popular herb that is grown for its fragrant leaves and seeds. There are several varieties of dill that can be grown in pots, each with its own unique characteristics and uses. In this section, I will discuss the popular dill cultivars and how to choose the right variety for pots.
Popular Dill Cultivars – Planting Dill in Pots
- Dukat: This variety of dill is known for its strong flavor and aroma. It has dark green leaves and is slow to bolt, making it a popular choice for gardeners.
- Fernleaf: Fernleaf dill is a compact variety that is perfect for growing in pots. It has delicate, fern-like leaves and a mild flavor that is perfect for salads and other dishes.
- Bouquet: Bouquet dill is another popular variety that is known for its large, fragrant flower heads. It has a strong flavor that is perfect for pickling and other recipes.
- Long Island Mammoth: This variety of dill is known for its large size and vigorous growth. It has a strong flavor and is perfect for pickling and other recipes.
Choosing the Right Variety for Pots
When choosing a dill variety for pots, it is important to consider the size of the plant and its growing requirements. Some varieties of dill can grow quite large and may not be suitable for smaller pots. Here are some tips for choosing the right variety for pots:
- Size: Look for compact or dwarf varieties of dill, such as Fernleaf or Bouquet. These varieties are perfect for growing in pots and will not take up too much space.
- Growing Requirements: Make sure the dill variety you choose is suitable for growing in pots. Dill requires full sun and well-draining soil, so choose a pot that is at least 12 inches tall and has good bottom drainage.
- Flavor: Consider the flavor of the dill variety you choose. Some varieties, such as Dukat, have a strong flavor that is perfect for pickling and other recipes. Other varieties, such as Fernleaf, have a milder flavor that is perfect for salads and other dishes.
There are several varieties of dill that can be grown in pots. When choosing a variety, consider the size of the plant, its growing requirements, and its flavor. By choosing the right variety, you can enjoy fresh dill leaves and seeds all season long.
Seasonal Considerations – Planting Dill in Pots

Best Time to Plant Dill
As an annual herb, dill is best planted in the spring after the last frost. In most zones, this is usually around mid to late April. However, it’s important to note that dill can tolerate some frost, so if the temperature drops below freezing for a short period, it should still survive.
If you live in a warmer climate, you can plant dill in the fall as well. Just make sure to plant it early enough so that it has time to mature before the first frost.
Protecting Dill from Frost – Planting Dill in Pots
While dill can tolerate some frost, it’s still important to protect it if the temperature drops below freezing for an extended period. One way to protect your dill is to cover it with a frost cloth or blanket. This will help to insulate the plant and keep it warm.
Another way to protect your dill is to move it indoors if you’re growing it in a pot. Simply bring the pot inside and place it in a sunny window. Make sure to keep the soil moist and provide plenty of light to help the plant thrive.
Overall, planting dill in pots can be a great way to enjoy fresh herbs all year round. By following these seasonal considerations, you can ensure that your dill plants thrive and produce plenty of flavorful leaves and seeds.
Additional Tips for Growing Dill in Pots
If you’re new to gardening, growing dill in pots is a great way to start. Dill is an easy-to-grow herb that adds a fresh, fragrant flavor to many dishes. Here are some additional tips for growing dill in pots:
Position and Accessibility
Position your dill pot in an area that gets at least 6 hours of direct sunlight per day. Dill plants need plenty of light to grow strong and healthy. Place the pot near a window that faces south or west, or outside in a sunny spot.
It’s also important to choose a location that is easily accessible for harvesting. Dill leaves are best harvested when they are young and tender, so you’ll want to be able to reach the plant easily. If you’re growing your dill pot outside, consider placing it near your kitchen or dining area for easy access.
Companion Planting – Planting Dill in Pots
Companion planting is a great way to maximize the space in your dill pot and attract pollinators to your garden. Dill is a great companion plant for many vegetables, including tomatoes, cucumbers, and lettuce.
Planting dill near these vegetables can help repel harmful insects and attract beneficial ones, like butterflies and bees. Dill is also an upright plant, so it can provide some shade for smaller plants that prefer partial sun.
Consider planting other fragrant herbs, like basil or thyme, in your dill pot as well. Not only will they add some color and variety to your garden, but they can also help repel pests and add flavor to your dishes.
Overall, growing dill in pots is a fun and rewarding experience. With these additional tips, you’ll be able to enjoy fresh, flavorful dill all season long.
Dill-lightful Pots: Planting Dill in Pots
So let’s dive into the delightful world of planting dill in pots!
Now, dill is a versatile herb. It’s great in pickles, salads, and more. But did you know it’s also perfect for pot planting? That’s right, folks!
You see, dill has a compact growth habit. This makes it ideal for pots. Plus, it’s a great way to keep fresh dill at your fingertips!
But here’s the kicker. Dill loves sunlight. So, make sure your pot gets plenty of it. Your dill will thank you!
So, if you’re ready to dive into the world of dill, head over to theherbprof.com. It’s your one-stop shop for all things herbal!
References – Planting Dill in Pots
Little Herb Encyclopedia, by Jack Ritchason; N.D., Woodland Publishing Incorporated, 1995
The Ultimate Healing System, Course Manual, Copyright 1985, Don Lepore
Planetary Herbology, Michael Tierra, C.A., N.D., Lotus Press, 1988
Handbook of Medicinal Herbs, by James A. Duke, Pub. CRP Second Edition 2007
The Complete Medicinal Herbal, by Penelope Ody, Published by Dorling Kindersley
Check the Following Article
Best Fertilizer For Tomato Plants: Top Picks For Harvest
Frequently Asked Questions – Planting Dill in Pots
1. How many dill plants should be planted per container for optimal growth?
It is recommended to plant one to two dill plants per container for optimal growth. This ensures that each plant has enough space to grow and receive adequate water and nutrients. Overcrowding can lead to stunted growth and poor health of the plants.
2. What are the best companion plants for dill when grown in pots?
Dill is a great companion plant for many herbs and vegetables, including basil, chives, lettuce, and cucumbers. These plants can help repel pests and attract beneficial insects, leading to healthier and more productive plants.
3. What are the necessary conditions for growing dill indoors in pots?
Dill requires well-draining soil, plenty of sunlight, and regular watering to grow indoors in pots. It is important to ensure that the soil is moist but not waterlogged and that the pot has good drainage to prevent root rot. Dill also prefers warm temperatures, so it is important to keep the plant in a warm and sunny location.
4. Is full sun necessary for dill, or can it grow in partial shade?
Dill prefers full sun and requires at least six hours of direct sunlight per day for optimal growth. However, it can tolerate some shade and can be grown in partial shade if necessary. If growing dill in partial shade, it is important to ensure that the plant still receives enough sunlight to grow and thrive.
5. What are the tips for keeping dill alive and healthy in pots?
To keep dill alive and healthy in pots, it is important to provide it with adequate water, sunlight, and nutrients. Dill should be watered regularly to keep the soil moist but not waterlogged and should be fertilized every four to six weeks with a balanced fertilizer. It is also important to prune the plant regularly to prevent it from becoming too leggy and to encourage bushier growth.
6. In which locations, such as Texas, do dill plants thrive best when potted?
Dill plants thrive best in warm and sunny locations, such as Texas, when potted. However, it is important to ensure that the plant is not exposed to extreme heat or drought, as this can lead to poor growth and health. It is also important to protect the plant from strong winds and heavy rain, as this can damage the delicate leaves and stems.