

Paul Johnston is the founder and master herbalist of The Herb Prof, with decades of clinical experience in naturopathic medicine, herbal remedies, detoxification and holistic wellness. After overcoming his own serious health challenges, he now dedicates himself to helping others reclaim their health naturally.
Many people would love to try making their own soap but aren’t sure how to begin. The process requires a few key tools, such as digital scales, thermometers, and immersion blenders. In this blog, we’ll walk beginners through 10 simple herbal soap recipes. Start creating your own soap today!
Key Takeaways
- Herbal soap-making needs tools like digital scales, thermometers, and immersion blenders.
- Safety is important when working with lye in soap making. Always wear gloves and goggles.
- Essential oils like lavender or peppermint add scents to soaps. Natural colorants can add beauty without chemicals.
- Soap recipes can be easy for beginners. For example, Lavender Relaxation Soap uses olive oil and lavender essential oil.
- Caring for handmade soaps includes storing them in a cool, dry place and letting them cure for 4 to 6 weeks before use.
Essential Equipment for Soap Making – Herbal Soap Recipes
To make your soap, you need some special tools. Get a mixing bowl, mold for shaping the soap, and gloves to keep it safe.
Tools and materials needed
You need the right tools and materials to make your soap successfully. Safety is key, so always use protective gear. Here’s what you’ll need:
- Digital scale: Ensures accurate measurements of ingredients.
- Thermometer: Monitors temperature for mixing lye and oils correctly.
- Immersion blender: Speeds up the mixing process to achieve trace faster.
- Containers: Use one for lye solution and another for mixing your soap.
- Gloves and goggles: Protects skin and eyes from caustic lye.
- Spatulas and spoons: Helps in stirring and mixing soap batter.
- Soap mold: Shapes your soap as it cools and hardens.
- Stainless steel pan: For heating oils and butter.
- Infrared thermometer: Offers a non-contact way to check temperatures.
- Rubber spatula: Scrape down bowls to ensure all ingredients are mixed in.
- Heat-proof jug: Safe container for preparing lye solution.
Each tool plays a crucial role in making handmade soap, from measuring ingredients accurately with a digital scale to safely blending them with an immersion blender, ensuring both safety and quality in your soap-making process.
Safety Tips
Gathering your tools and materials is the first step in soap making. Next, you must focus on safety to ensure a smooth and safe process.
- Always wear safety goggles and gloves to protect your eyes and skin from lye burns.
- Work in a well-ventilated area to avoid inhaling harmful fumes.
- Keep vinegar nearby; it neutralizes any lye spills on your skin.
- Use precise measurements for sodium hydroxide to prevent a dangerous chemical reaction.
- Never pour water into the lye; always add lye to the water to avoid a volcanic effect.
- Mix lye with water in a heat-resistant container to withstand high temperatures without breaking.
- Store lye and freshly made soap out of reach of children and pets for their safety.
- Avoid using utensils for food after they’ve been used in soap making due to contamination risks.
- Insulate your soap in colder conditions but avoid covering too tightly, which can lead to cracking.
- Allow soaps to cure for one month before use, ensuring they are mild and safe for the skin.
Following these steps closely ensures not only successful soap-making but also everyone’s safety throughout the process.
Basic Ingredients and Their Roles – Herbal Soap Recipes
To make soap, you mix oils like coconut or olive with lye and water. Things like shea butter add softness, while essential oils give scent and colorants add beauty.
Oils and butter
Olive oil, coconut oil, and shea butter are key ingredients in making your own soap. These oils and butter give the soap its smooth texture and moisturizing properties. For example, olive oil makes the soap gentle on the skin, while coconut oil offers a rich lather.
Shea butter adds a creamy touch that helps keep the skin soft.
Each batch uses distilled water, sodium hydroxide to turn oils into soap, and a mix of sunflower or sweet almond oil with castor oil for extra moisture. This combination ensures the final product is kind to your skin while cleaning it well.
Making six to eight small bars per recipe allows for plenty of practice without wasting materials.
Lye and water
After discussing oils and butter, we move to lye and water. You need distilled water and sodium hydroxide to make soap. Lye mixes with the water before joining the oils. This step begins the chemical reaction called saponification, turning oil into soap and glycerin.
Safety is key here. Always handle lye with care in a well-ventilated space. Use gloves and eye protection to avoid burns or injury. Measure these ingredients accurately using a digital scale to ensure your soap sets correctly without any harmful excess lye remaining.
Additives: Essential oils and colorants
Moving from lye and water, essential oils and colorants play a crucial role in soap making. You can use up to 3 teaspoons of essential oils per batch to give your soap a lovely smell and additional benefits.
For color, both natural and artificial options bring life and appeal to each bar. Essential oils like lavender or peppermint add relaxing or refreshing qualities, while turmeric or beetroot powder can offer vibrant hues without chemicals.
Natural colorants ensure that the soaps remain gentle on the skin, perfect for those looking to avoid synthetic dyes. With these additives, makers have endless possibilities to customize their creations, appealing to various preferences and needs.
Understanding the Soap Making Process – Herbal Soap Recipes
Making soap involves two main methods: the cold process and melt and pour. The cold method mixes fats with lye to start a chemical reaction, while melt and pour uses pre-made blocks you can melt and customize.
Overview of the cold process method
The cold process method mixes fats like olive oil or coconut oil with lye water to start a chemical reaction called saponification. This turns the mix into soap and glycerin. First, you measure the oils, lye, and water carefully.
Safety gear is a must during this step to protect your skin and eyes from harm. Then, combine the oils and lye solution at the right temperature. Stir them until they reach “trace,” where the mixture thickens like custard within 3-10 minutes.
Next, pour the thickened blend into molds and decorate with herbs if desired. The soaps need to rest in their molds for a day before cutting into bars. These bars then cure on racks for 4-6 weeks to harden and finish saponifying.
After curing, these homemade soaps can last up to two years with proper storage.
Melt and pour technique
Moving from the cold process, melt and pour soap making is easier for beginners. In this method, you use pre-made soap bases that have already gone through the saponification process.
This means no dealing with lye yourself. Simply melt the base in a microwave or double boiler, then add your choice of essential oils, colors, and herbs like lavender or rose geranium.
Pour it into molds and let it cool.
With melt and pour, you can make 6-8 small bars per batch, perfect for trying different recipes. You can still customize your soap by adding up to 3 teaspoons of essential oils per pound of soap base or by using herbal teas for added benefits.
This method lets you focus on the fun parts of soap making: choosing scents, colors, and additives like cocoa butter or ylang ylang for their fragrance and skin benefits.
Top 10 Herbal Soap Recipes for Beginners
Recipe 1: Lavender Relaxation Soap – Herbal Soap Recipes
Making Lavender Relaxation Soap starts with mixing olive oil, coconut butter, and lavender essential oil. This blend soothes the skin and calms the mind.
Ingredients and instructions
Making herbal soap at home is a rewarding process. It combines creativity with practical skills to create useful products. Here’s how to make Lavender Relaxation Soap, which yields 6-8 small bars.
- Gather your materials: distilled water, sodium hydroxide (lye), olive oil, coconut oil, shea butter, sunflower oil, castor oil, lavender essential oil, and dried lavender flowers.
- Wear protective gear including gloves and goggles for safety.
- Measure 12 ounces of distilled water and carefully add 4.3 ounces of lye to it. Stir until dissolved and set aside to cool.
- Combine 9 ounces of olive oil, 9 ounces of coconut oil, and 9 ounces of shea butter in a large pot. Melt over low heat.
- Add 1 ounce each of sunflower oil and castor oil to the melted mixture.
- Check temperatures: the lye solution should cool down to about 100-110°F, as should the oils mixture.
- Slowly pour the lye solution into the oils while stirring gently until fully mixed.
- Stir in 3 teaspoons of lavender essential oil for fragrance.
- Pour the soap mixture into molds immediately after adding essential oils.
- Sprinkle dried lavender flowers on top for extra detail and texture before the soap hardens.
- Cover molds lightly with wax paper or cloth and leave undisturbed for 24 hours to set.
- After setting, remove soaps from molds and allow them to cure in a dry area for four weeks before use.
This detailed process ensures you end up with beautifully scented Lavender Relaxation Soap bars that are perfect for personal use or gifting!
Benefits of lavender
Lavender makes your mind calm and your body relax. This plant is famous for its sweet scent that helps people sleep better. It also has properties that can heal skin, making it a top choice for soap makers.
Lavender oil in soap fights bacteria and reduces inflammation. This means it’s good for acne and soothing irritated skin. People use lavender soaps to cleanse gently without drying out their skin.
Using this herb in soap recipes brings a touch of nature’s calm to your daily routine, offering both mental and physical benefits with every wash.
Recipe 2: Peppermint Refresh Soap – Herbal Soap Recipes
Peppermint Refresh Soap uses peppermint to wake up your skin. Making this soap can be fun and leaves your skin feeling cool and renewed.
Benefits of peppermint
Peppermint oil in soap naturally cools the skin. This makes your bath refreshing. It can also help reduce itching and irritation. Using peppermint soap eases stress because its scent calms nerves.
Peppermint has menthol, which improves skin’s health by clearing pores. Soaps with peppermint are good for waking up your senses and keeping your skin clean.
Recipe 3: Calendula Soothing Soap – Herbal Soap Recipes
Make your own Calendula Soothing Soap and feel its skin-calming effects. This recipe uses calendula petals, oils, lye, and water for a gentle touch on your skin.
Benefits of calendula
Calendula has powerful benefits for the skin. It heals cuts, wounds, and insect bites. This herb fights inflammation and reduces redness. Calendula also helps in healing sunburns quickly.
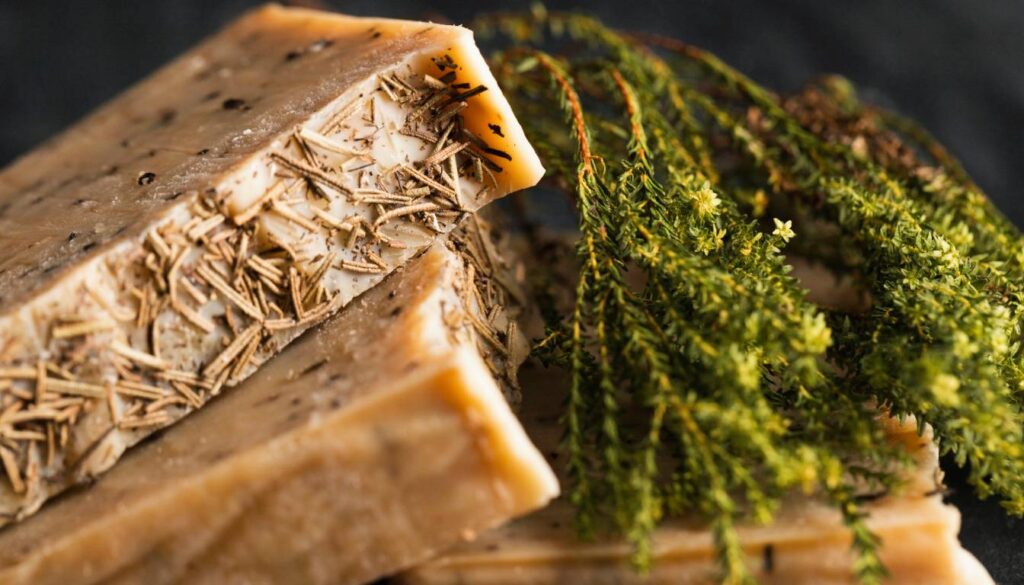
Recipe 4: Rosemary Clarity Soap – Herbal Soap Recipes
Make Rosemary Clarity Soap to help clear your mind. This soap uses rosemary, known for boosting focus. Try making it today!
Benefits of rosemary
Rosemary boosts memory and focus. It has antioxidants that fight off skin ageing. This herb also improves hair growth and reduces dandruff when used in soap. Rosemary’s antibacterial properties help with skin problems like acne.
It gives the soap a refreshing scent too.
Recipe 5: Chamomile Gentle Soap – Herbal Soap Recipes
Making Chamomile Gentle Soap blends calming chamomile flowers with simple soap-making ingredients. This recipe turns out a soothing bar, perfect for sensitive skin.
Benefits of chamomile
Chamomile has powerful soothing properties. It calms skin and reduces redness. Chamomile also speeds up the healing of minor cuts and sunburns. This herb is known for its gentle nature, making it perfect for sensitive skin.
Recipe 6: Herbal Citrus Burst Soap – Herbal Soap Recipes
Make Herbal Citrus Burst Soap with orange and lemon herbs for a fresh feel. This soap uses natural oils and citrus scents to wake up your skin.
Benefits of citrus herbs
Citrus herbs add a fresh, clean smell to soaps. They are full of vitamin C and antioxidants. These nutrients help keep the skin healthy and bright. Citrus oils from lemons, oranges, and limes can make the skin feel refreshed.
They also help clear up oily skin.
Next, let’s explore the detoxifying qualities of dill in soap making.
Recipe 7: Dill Detox Soap – Herbal Soap Recipes
Dill Detox Soap cleans your skin deeply with the power of dill. Try making it for a refreshing feel.
Benefits of dill
Dill packs a punch with its benefits, good for digestion and calming the stomach. This herb also fights off swelling in our bodies. People find it helpful for lowering sugar levels in your blood.
Its rich aroma turns any soap into a refreshing experience.
Using dill in soap means you get clean and enjoy its healing traits. It’s perfect for people who want their skin to feel cool and calm. With every wash, dill can help keep your skin healthy and clear.
Recipe 8: Basil Revive Soap – Herbal Soap Recipes
Making Basil Revive Soap is easy and fun. You need basil, oils, and lye to start creating a soap that wakes up your skin.
Benefits of basil
Basil boosts skin health. It fights off bacteria and reduces swelling. This herb makes your skin look bright and feel smooth. People use basil in soaps for its fresh scent and healing properties.
This plant also helps with calming the mind. When added to soap, it provides a soothing aroma that can ease stress. Basil is rich in vitamins that nourish the skin deeply, making it a great choice for daily care routines.
Recipe 9: Rose Geranium Balancing Soap – Herbal Soap Recipes
Make your own Rose Geranium Balancing Soap with simple steps. The scent of rose geranium helps balance the mind while offering skin benefits.
Benefits of rose geranium
Rose geranium oil is great for your skin. It helps heal cuts and bruises faster. This oil also fights skin infections, making it a smart choice for soap. Many people use rose geranium oil to help with acne and reduce inflammation.
It has a scent that calms the mind, too.
This plant’s benefits do not stop at skincare. Rose geranium can balance hormones and ease nerve pain when used in soaps. People find its fragrance uplifting, which may lower stress levels after a long day.
Using soap with this oil makes you feel good inside and out.
Recipe 10: Herbal Healing Soap with Eucalyptus – Herbal Soap Recipes
Make Herbal Healing Soap with eucalyptus to clear your skin and breathe easier. Learn more recipes for a fresh start!
Benefits of eucalyptus
Eucalyptus oil, a key addition to soap, kills germs and helps clear your nose. It also soothes the skin by reducing itchiness and irritation. People often use eucalyptus in soaps for its fresh smell that leaves the skin feeling clean and invigorated.
This plant’s properties make it an excellent choice for those seeking a natural way to enhance their skincare routine.
Using eucalyptus in herbal healing soap brings several benefits beyond simple cleansing. It improves breathing, fights against infection, and offers pain relief from conditions like arthritis.
Soaps with eucalyptus can turn daily showers into an uplifting experience that boosts both health and mood.
Tips for Customizing Your Herbal Soaps – Herbal Soap Recipes
To make your herbal soaps special, learn to blend oils with plants. Mixing different smells helps create unique bars.
How to infuse oils with herbs
Infusing oils with herbs turns plain oils into powerful blends for soap making. This process extracts the benefits of herbs into oils, making your soaps more effective.
- Choose a carrier oil like olive or coconut oil.
- Pick fresh or dry herbs. Lavender and rosemary are great options.
- Clean the herbs to remove any dirt.
- If using dry herbs, crush them lightly to increase surface area.
- Place the herbs in a clean jar.
- Pour the carrier oil over the herbs until completely covered.
- Seal the jar tightly to prevent moisture from getting in.
- Store the jar in a warm place away from direct sunlight for 4-6 weeks. A kitchen cupboard works well.
- Shake the jar gently every few days to mix the contents.
- After infusion, strain the oil through a cheesecloth into another clean jar.
- Squeeze out as much oil as possible from the herbs.
- Label the infused oil with its contents and date of creation.
Using this method, you create potent herbal oils perfect for crafting aromatic and beneficial soaps at home.
Mixing and matching scents
To create unique scents for soap, mix and match essential oils like chamomile, lavender, and rose geranium. Use up to 3 teaspoons of these oils per batch of soap. This allows for personalization while ensuring the scent is not overpowering.
For example, combining lavender, known for its relaxing properties, with the uplifting notes of citrus herbs can make a soap that both calms and energizes. Always measure carefully to keep the balance right.
Next, learn about caring for your handmade soaps.
Caring for Your Handmade Soaps
Keep your homemade soaps dry and cool. Let them cure for 4-6 weeks to last longer.
Proper storage
Store your handmade soaps in a cool, dry place away from direct sunlight. This prevents them from melting or losing their scent. Use breathable materials like paper for wrapping the bars to keep moisture out but let air circulate.
After making soap, it must cure for one month to reach its best quality and last up to two years.
Place soaps on a rack with enough space between each bar during the curing process. This setup ensures that air flows around all sides of the soap, which helps it harden evenly. Keep this setup in an area with low humidity and stable temperature to maintain the soap’s texture and aroma.
Curing process
The curing process takes one month. It makes your soap last up to two years. You leave the soap in a cool, dry place for 4-6 weeks after pouring it into the mould. This time helps the soap become harder and milder for your skin.
Next comes proper storage tips to keep your handmade soaps in perfect condition.
Before You Go – Herbal Soap Recipes
Making soap at home is a fun and creative way to blend art with science. These 10 herbal soap recipes guide beginners through simple steps, using items like digital scales, thermometers, and immersion blenders.
Each recipe features natural ingredients such as olive oil, coconut oil, and essential oils that play specific roles in the soap-making process. From Lavender Relaxation Soap to Herbal Healing Soap with Eucalyptus, each brings unique benefits to the skin.
By following these formulas, anyone can create soothing soaps enriched with the goodness of herbs right in their kitchen.
Herbal Soap Recipes and TheHerbProf.com: A Bubbly Connection
Let’s lather up the Herbal Soap Recipes and their bubbly relationship with our favorite herbal hub, TheHerbProf.com.
Firstly, let’s soap up the Herbal Soap Recipes. It’s a collection of recipes that infuse herbs into your soap. It’s like a spa day for your skin!
Now, how does this bubble with TheHerbProf.com? Well, our website is a bath of herbal wisdom. We offer a wealth of information on various herbs and recipes, including the bubbly Herbal Soap Recipes.
When you explore our site, you’ll find a tub of information about these recipes. From their benefits to how to make them, we’ve got it all covered! And the more you learn, the more you’ll appreciate these bubbly recipes.
But wait, there’s more! This relationship isn’t just one-sided. The popularity of the Herbal Soap Recipes brings more visitors to our site. More visitors mean more awareness about the amazing world of herbs. It’s a win-win situation!
So, in essence, the Herbal Soap Recipes and TheHerbProf.com help each other bubble up. They’re like a soap and a sponge in the vast bath of herbal wisdom. And we, as the bathers, get to enjoy the fruits of their symbiosis. Isn’t that just bubbly?
Remember, folks, herbs are your friends. So, let’s continue exploring, learning, and growing with TheHerbProf.com and our bubbly Herbal Soap Recipes.
References – Herbal Soap Recipes
Little Herb Encyclopedia, by Jack Ritchason; N.D., Woodland Publishing Incorporated, 1995
The Ultimate Healing System, Course Manual, Copyright 1985, Don Lepore
Planetary Herbology, Michael Tierra, C.A., N.D., Lotus Press, 1988
Handbook of Medicinal Herbs, by James A. Duke, Pub. CRP Second Edition 2007
The Complete Medicinal Herbal, by Penelope Ody, Published by Dorling Kindersley
Check the Following Articles!
Herb-Infused Liquor Recipes for Delicious Cocktails
Herbal Recipes for Vibrant Health: Top 10 Wellness Beauty
What Herbs Grow Well with Mint: Companion Planting
Frequently Asked Questions – Herbal Soap Recipes
1. What oils do I need for herbal soap making?
You need evoo, also known as olive oil and tallow for the base. Glycerol adds moisture.
2. Can I use lavender in my soap recipes?
Yes, use Lavandula Angustifolia, commonly known as lavender, to add scent and healing properties.
3. What is the hot process method in soap making?
The hot process method cooks ingredients together, speeding up the soap’s readiness compared to the cold method.
4. Who can guide me in choosing herbs for my soaps?
A herbalist can advise on selecting beneficial herbs for your specific needs in soap recipes.