
Paul Johnston is the founder and master herbalist of The Herb Prof, with decades of clinical experience in naturopathic medicine, herbal remedies, detoxification and holistic wellness. After overcoming his own serious health challenges, he now dedicates himself to helping others reclaim their health naturally.
I’ve always been interested in finding ways to reduce household waste and create natural fertilizers for my garden. That’s why I decided to build my own DIY worm bin for vermicomposting. Vermicomposting is the process of using worms to decompose organic waste into nutrient-rich compost, also known as vermicompost.
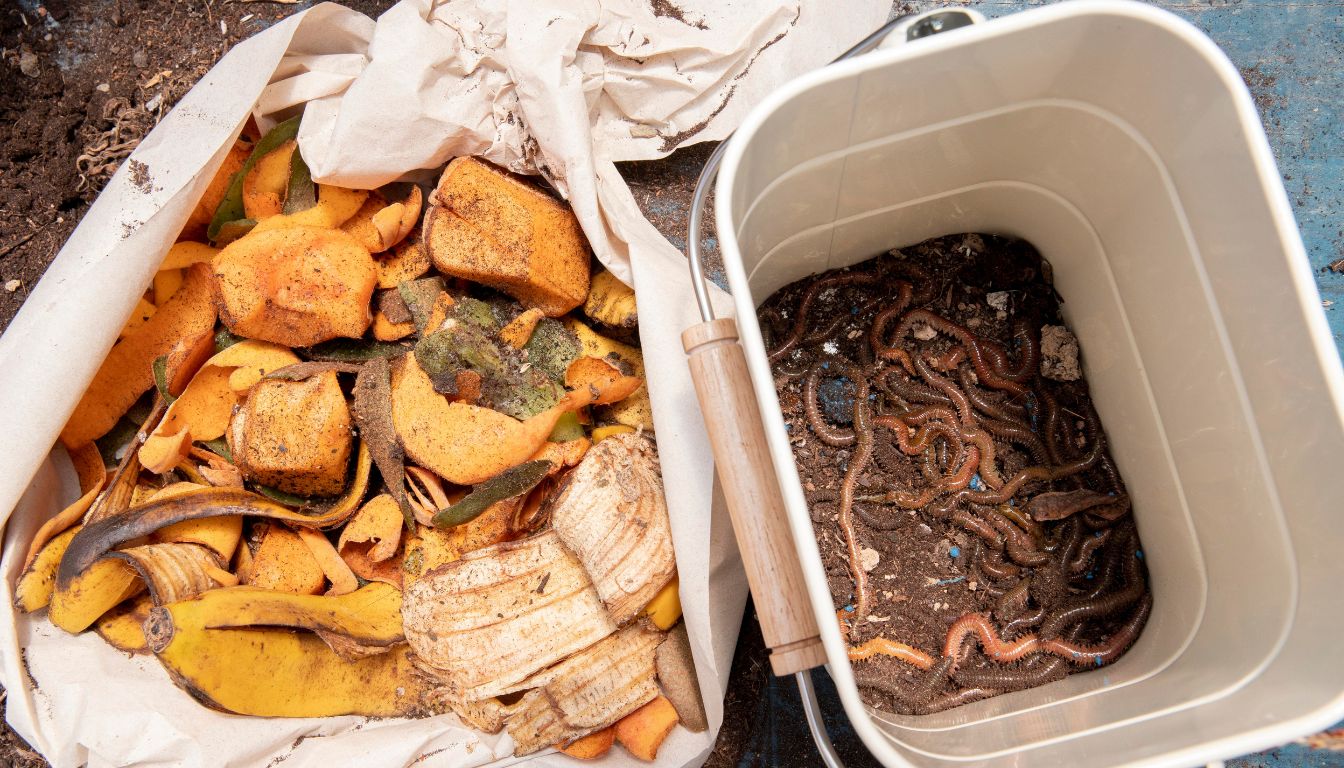
Vermicomposting is a simple and effective way to turn food scraps and other organic materials into a valuable resource for your garden. Building your own DIY worm bin is easy and affordable. All you need is a container, some bedding material, and a handful of red wiggler worms. Red wigglers are the most common type of worm used for vermicomposting because they are efficient at breaking down organic matter and reproducing quickly.
A worm bin can be made from a variety of materials, such as plastic containers, wooden boxes, or even a repurposed bathtub. The container should be shallow, no more than 12 inches deep, to allow for proper air circulation and moisture control.
Understanding Vermicomposting
I am always looking for ways to improve the health and fertility of my soil. One method that I have found to be particularly effective is vermicomposting.
Benefits of Vermicomposting
There are many benefits to vermicomposting. First and foremost, it is an excellent way to recycle food waste. By using worms to break down organic matter, we can reduce the amount of waste that ends up in landfills, where it contributes to greenhouse gas emissions and other environmental problems.
In addition to reducing waste, vermicomposting also produces a high-quality fertilizer that is rich in nutrients and beneficial microorganisms. This fertilizer can be used to improve soil health, increase plant growth, and boost crop yields.
Principles of Worm Composting
Worm composting relies on a few straightforward principles. To begin, set up a worm bin that includes a container, bedding material, and worms. Containers may be made from plastic bins, wooden boxes, or even repurposed bathtubs, giving you flexibility depending on what you have available.
Bedding should combine carbon‑rich materials such as shredded newspaper or cardboard with nitrogen‑rich inputs like food scraps or grass clippings. Once the worms are added, they immediately start breaking down the organic matter. Over time, their activity produces nutrient‑dense castings, which enrich the soil and provide plants with a natural boost.
Designing Your DIY Worm Bin
When designing your own worm bin, there are a few important factors to consider. In this section, I will guide you through the process of selecting the right container and creating proper ventilation and drainage.
Choosing the Right Container
The container you choose for your worm bin can greatly impact the success of your vermicomposting project. You can use a variety of materials such as plastic, wood, or even bricks. However, make sure that the container is at least 8-12 inches deep to provide enough space for the worms to move around and aerate the compost.
I recommend using a plastic container because it is lightweight, inexpensive, and easy to drill holes into. You can find plastic storage containers at your local home improvement store or online.
Creating Proper Ventilation and Drainage
Proper ventilation and drainage play a crucial role in keeping worms healthy and ensuring the success of a worm bin. When airflow is limited, the bin overheats and becomes stagnant, harming the worms and slowing the composting process. Excess moisture from poor drainage creates an environment that harms the worms as well and leads to unpleasant odors.
To create proper ventilation, use a power drill to create ventilation holes around the sides of the container near the top. I recommend using a 1/4 inch drill bit and spacing the holes about 2 inches apart. This will allow for fresh air exchange and prevent the bin from getting too hot or stagnant.
To create proper drainage, drill a few small holes in the bottom of the container. This will allow excess moisture to drain out of the bin and prevent it from becoming too wet.
Setting Up Your Worm Bin
When it comes to setting up a DIY worm bin, there are a few key steps to follow to ensure success. In this section, I will cover the two most important steps: layering bedding materials and adding worms to the bin.
Layering Bedding Materials
The first step to setting up your worm bin is to layer bedding materials. Bedding materials provide the necessary environment for your worms to thrive. Some popular bedding materials include shredded newspaper, cardboard, coir, and peat moss. These materials should be moistened before adding them to the bin.
To layer your bedding materials, start with a layer of shredded newspaper or cardboard at the bottom of the bin. Then, add a layer of coir or peat moss. Repeat this process until the bin is about half full. Be sure to moisten each layer as you go.
Adding Worms to the Bin
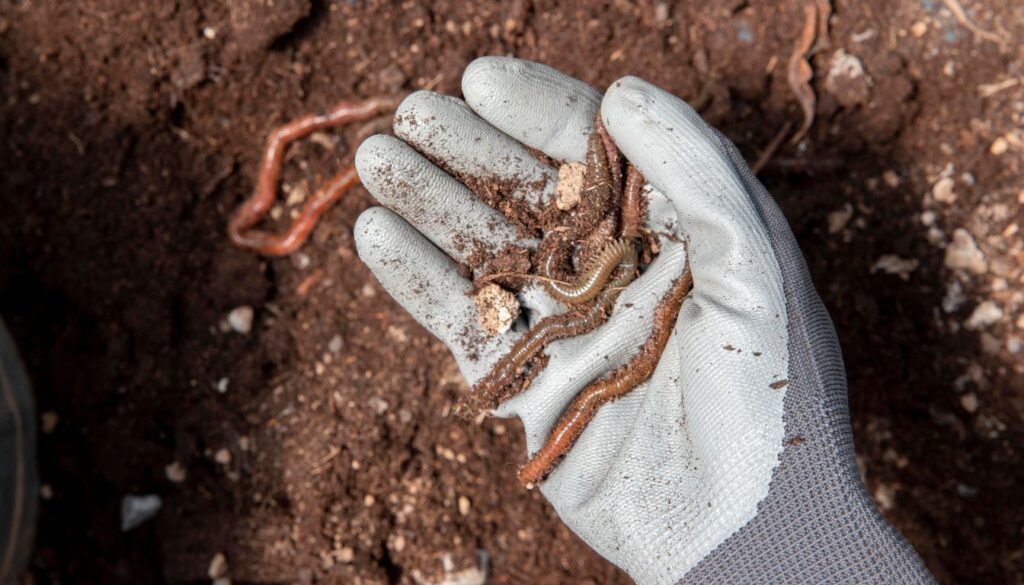
Once your bedding materials are in place, it’s time to add your worms. The most common type of worm used in vermicomposting is the red wiggler, also known as Eisenia fetida. You can purchase red wigglers online or at your local gardening store.
To add your worms to the bin, simply place them on top of the bedding materials. It’s best to start with a small number of worms and gradually increase the population as they reproduce. It’s important to note that not all worms are suitable for vermicomposting. Avoid using nightcrawlers or other types of earthworms, as they are not adapted to the conditions of a worm bin.
Feeding Your Worms
As I mentioned earlier, worms love to eat organic matter. But what exactly should you feed them? Here are some guidelines for feeding your worms:
What to Feed Your Worms
- Fruit and vegetable scraps: Worms love fruit and vegetable scraps, such as banana peels, apple cores, and carrot tops. Chop them up into small pieces to make it easier for the worms to digest.
- Coffee grounds and tea bags: Used coffee grounds and tea bags are also great worm food. They add nitrogen to the compost and help to balance the pH level.
- Pasta and bread: Leftover pasta and bread can also be fed to your worms. Just make sure to tear them into small pieces first.
- Eggshells: Crushed eggshells are a good source of calcium for your worms. They also help to balance the pH level of the compost.
Foods to Avoid
While worms can eat a wide variety of organic matter, some foods should be avoided:
- Meat and dairy products: Worms don’t have teeth, so they can’t chew their food. Meat and dairy products take a long time to decompose and can attract pests and flies.
- Citrus: Citrus fruits, such as oranges and lemons, are too acidic for worms and can harm their delicate skin.
- Oily and greasy foods: Oily and greasy foods, such as fried foods and salad dressing, can coat the worms’ skin and make it difficult for them to breathe.
In general, you should avoid feeding your worms anything too salty, spicy, or acidic. Stick to feeding them a balanced diet of fruit and vegetable scraps, coffee grounds, tea bags, pasta, bread, and crushed eggshells, and your worms will be happy and healthy.
Maintaining the Worm Bin
As with any living organism, maintaining the right conditions is crucial for the health and well-being of your worms. In this section, I will cover the three key areas of worm bin maintenance: managing moisture levels, controlling temperature and light, and preventing pests and odors.
Managing Moisture Levels
One of the most important aspects of maintaining a worm bin is managing the moisture level. Too much moisture can lead to anaerobic conditions and bad smells, while too little can cause dehydration and death of the worms. The ideal moisture level is similar to that of a wrung-out sponge.
To maintain the right level of moisture, I recommend adding water to the bedding material as needed. You can also add more bedding material to absorb excess moisture. It’s important to monitor the moisture level regularly, especially during hot and humid weather.
Controlling Temperature and Light
Worms thrive in temperatures between 55°F and 77°F. Temperatures above 84°F can be fatal to worms. Therefore, it’s important to keep your worm bin in a cool, shaded area. You can also use a thermometer to monitor the temperature inside the bin.
Worms prefer darkness, so it’s important to keep the bin in a dark area or cover it with a dark cloth. Too much light can stress out the worms and cause them to burrow deeper into the bedding material.
Preventing Pests and Odors
Flies and other pests can be attracted to the food scraps in the worm bin. To prevent this, I recommend burying the food scraps under the bedding material. You can also add a layer of dry leaves or shredded paper on top of the food scraps.
Odors can be a sign of too much moisture or too little aeration. To prevent odors, make sure the bedding material is well-aerated and not too wet. You can also add dry bedding material or shredded paper to absorb excess moisture.
Harvesting Vermicompost
Once your worms have been hard at work breaking down your food scraps and bedding, it’s time to harvest the finished vermicompost. Harvesting the vermicompost is a simple process that involves separating the worms from the compost and collecting the worm castings.
Separating Worms from Compost
There are a few methods for separating the worms from the compost.
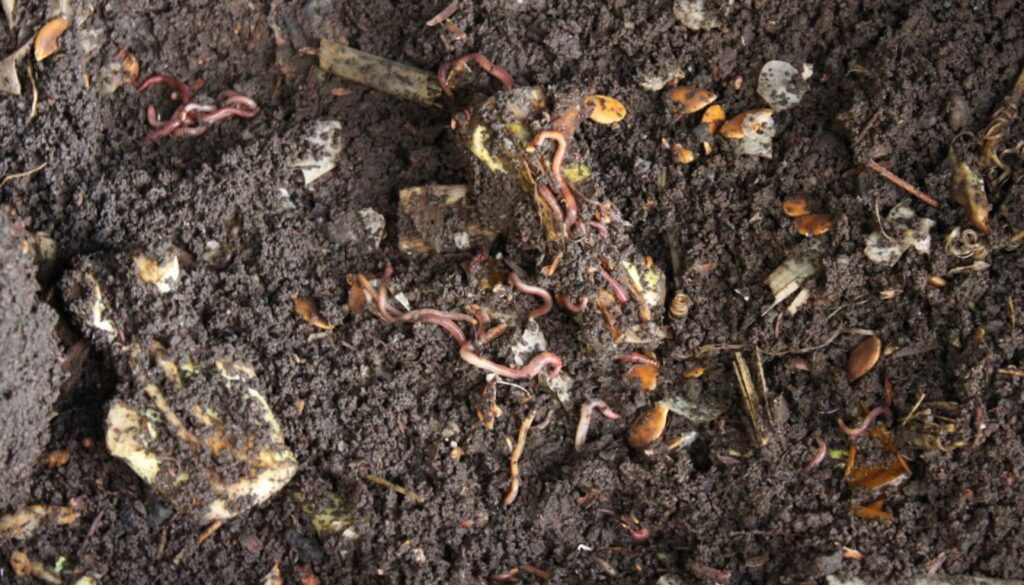
One popular method is to use a screen or mesh to sift the compost and collect the worm castings. To do this, dump a small amount of the bin contents onto the screen and gently shake or rub the material to allow the castings to fall through the holes. Pick out any worms and large pieces of bedding or food and return them to the bin. Repeat this process until all the castings have been harvested.
Another method is to use a two-bin system. In this system, the top bin is used for feeding the worms, and the bottom bin collects the worm castings. When it’s time to harvest, simply stop feeding the worms in the top bin and add fresh bedding to the bottom bin. The worms will migrate to the top bin, leaving the finished compost in the bottom bin.
Using Worm Castings in Your Garden
Worm castings serve as a valuable soil amendment that boosts the health and productivity of any garden. They contain beneficial microorganisms, nutrients, and enzymes that strengthen plants and support vigorous growth.
To use worm castings in your garden, simply mix them into the soil around your plants. You can also make a tea by steeping the castings in water and using the liquid to water your plants. Worm castings can also be used as a top dressing around plants or added to potting soil to improve soil health.
Additional Tips and Tricks
While a basic worm bin works well on its own, a few simple add‑ons can make the system more efficient and easier to manage. These accessories help regulate conditions inside the bin, simplify the harvesting process, and create a healthier environment for your worms.
DIY Worm Bin Accessories
There are a few accessories that can make your DIY worm bin more efficient and effective. Here are a few options to consider:
- Lid: A lid can help regulate moisture and prevent escape. You can use a plastic lid from a storage container or make your own out of wood or mesh.
- Tray System: A tray system can make it easier to harvest worm castings. You can stack multiple trays on top of each other, with the top tray holding fresh food and bedding and the bottom tray collecting castings.
- Weight: Adding a weight, such as a brick or rock, on top of the bedding can help compress the material and create a more stable environment for the worms.
Troubleshooting Common Issues
If you’re having trouble with your DIY worm bin, here are some common issues and solutions to consider:
- Escape: If worms are escaping, make sure there are enough air holes in the bin and that the lid is secure. You can also add a layer of moist newspaper on top of the bedding to discourage escape.
- Moisture: If the bedding is too wet, add dry bedding material and reduce the amount of fresh food. If the bedding is too dry, mist it with water or add more fresh food with high moisture content.
- Odor: If the bin smells bad, it may be too wet or have too much fresh food. Make sure to balance the amount of food with the number of worms and add bedding material as needed.
- Pests: If you notice pests, such as fruit flies or mites, make sure to bury fresh food deep in the bedding and avoid overfeeding. You can also add crushed eggshells to the bin to discourage pests.
Before You Go – Composting DIY Worm Bin
Building a DIY worm bin is more than just a fun project; it’s a commitment to healthier soil and a more sustainable lifestyle. By giving food scraps a second life, you reduce household waste while creating nutrient‑rich castings that boost plant growth. Remember to keep the bin well‑ventilated, maintain proper moisture, and use safe bedding materials to ensure your worms thrive.
With these simple practices, your composting system becomes a reliable source of organic fertilizer and a small but powerful step toward eco‑friendly gardening.
Don’t forget to add theherbprof.com homepage to your favourites so you don’t miss out on future articles!
References – DIY Worm Bin
Little Herb Encyclopedia, by Jack Ritchason; N.D., Woodland Publishing Incorporated, 1995
The Ultimate Healing System, Course Manual, Copyright 1985, Don Lepore
Planetary Herbology, Michael Tierra, C.A., N.D., Lotus Press, 1988
Handbook of Medicinal Herbs, by James A. Duke, Pub. CRP Second Edition 2007
The Complete Medicinal Herbal, by Penelope Ody, Published by Dorling Kindersley
Check the Following Articles
Vegetable Beets: A Nutritious Root Vegetable for Your Diet
Natural Ant Deterrent: Effective Solutions for Your Home
What To Do With Potatoes That Sprout Roots?
Shredded Cardboard Mulch: The Benefits and How to Use It
Frequently Asked Questions – DIY Worm Bin
What materials are needed to construct a simple indoor worm bin?
To build a simple indoor worm bin, gather a container, bedding material, food scraps, and worms. Choose a container made of plastic, wood, or any other non‑toxic material. Prepare bedding with shredded newspaper, cardboard, or coconut coir. Add food scraps such as fruit and vegetable peels, coffee grounds, and eggshells. Finally, introduce red wiggler worms, which you can purchase online or at a local garden center.
How can I create a stackable worm bin for efficient space usage?
Create a stackable worm bin to maximize space by using two or more plastic containers of the same size. Drill several small holes in the bottom of the top container, then place it on top of the bottom container. Add bedding and food scraps to the top container. As the worms finish the food in the bottom container, they move upward. Once the bottom container fills with worm castings, remove it and restart the process.
What are the steps to build a worm bin using a Rubbermaid container?
Build a worm bin with a Rubbermaid container by drilling several small holes in the bottom and sides for ventilation. Add bedding material, then layer in food scraps and worms. Cover the container with a lid and store it in a cool, dark place. Continue adding food scraps regularly and keep the bedding moist to maintain a healthy environment.
Can a worm bin be effectively made from wood, and what are the considerations?
You can make a worm bin from wood if you choose non‑toxic materials such as cedar or redwood. Avoid pressure‑treated lumber, and use untreated, unpainted boards. When building, ensure proper ventilation, design a removable lid for easy access, and line the bottom with wire mesh to keep worms inside.
What is the best way to set up an outdoor worm composting system?
Set up an outdoor worm composting system by choosing a shaded area with good drainage. Dig a hole and bury a plastic container with several small holes drilled in the sides and bottom. Add bedding, food scraps, and worms, then cover the container with a lid. Keep the bedding moist and add food scraps regularly. The worms break down the organic material and produce nutrient‑rich compost.
How do I maintain a worm bin in a 5-gallon bucket to ensure a healthy environment for the worms?
Maintain a worm bin in a 5‑gallon bucket by keeping the bedding moist and adding food scraps regularly. Avoid overfeeding, since excess food creates anaerobic conditions and unpleasant odors. Check the bedding’s moisture level often and add water when needed. Harvest worm castings from the bottom of the bucket as they accumulate.