
Paul Johnston is the founder and master herbalist of The Herb Prof, with decades of clinical experience in naturopathic medicine, herbal remedies, detoxification and holistic wellness. After overcoming his own serious health challenges, he now dedicates himself to helping others reclaim their health naturally.
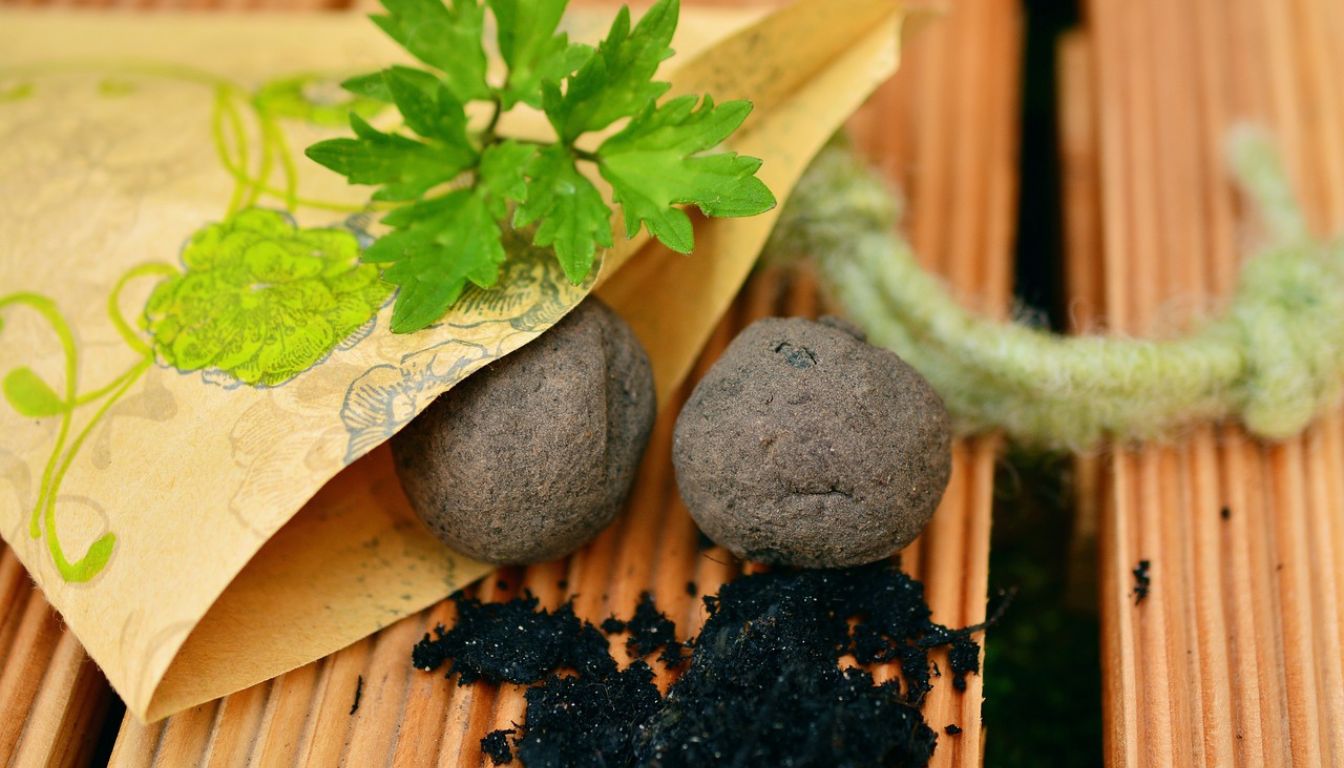
Seed bombs are a fun and easy way to plant seeds while also helping the environment. These small balls made of soil, compost, and seeds can be tossed onto bare ground to grow flowers, herbs, or even vegetables. They’re perfect for urban gardening, guerrilla gardening, or simply adding a touch of greenery to your community.
To make seed bombs, you will need soil, compost, seeds, and a binding agent such as clay powder or flour. The soil and compost provide the nutrients for the seeds to grow, while the binding agent helps the seed bombs hold their shape. You can also add water to the mixture to help it stick together. Once the mixture is ready, you can form it into small balls and let them dry.
Seed bombs are a great way to add some greenery to your garden or community. They are also an eco-friendly way to plant seeds and help the environment. With a few simple ingredients and some creativity, you can make your seed bombs and start growing your plants.
Understanding Seed Bombs
As a gardening enthusiast, I have always been intrigued by seed bombs. Seed bombs are small balls made of clay, compost, and seeds that can be thrown or scattered in a garden or an open space to grow wildflowers and other plants. In this section, I will explore the history and purpose of seed bombs, as well as their benefits for gardening and ecology.
History and Purpose
Seed bombs were first introduced by Masanobu Fukuoka, a Japanese farmer and philosopher, in the 1930s as a way to simplify the process of planting crops. The idea behind seed bombs was to make it easier for people to grow plants without having to till the soil or use heavy machinery. The concept was later adopted by guerrilla gardeners who used seed bombs to beautify abandoned lots and other neglected areas.
Today, seed bombs are used for a variety of purposes, including reforestation, habitat restoration, and gardening. They are a fun and easy way to introduce native plants and wildflowers to an area, and they can help support local ecosystems by providing food and shelter for insects and other wildlife.
Benefits of Gardening and Ecology
Seed bombs offer several benefits for gardening and ecology. For one, they are an inexpensive and low-maintenance way to grow plants. Seed bombs can be made at home using simple materials like clay, compost, and seeds, and they require little to no upkeep once they are planted.
Seed bombs are also beneficial for the environment. They can help improve soil quality by adding nutrients and organic matter to the soil. Additionally, seed bombs can help attract beneficial insects like bees and butterflies, which are important pollinators for many plants.
Seed bombs are a simple and effective way to grow plants and support local ecosystems. Whether you are a gardener looking to introduce native plants to your yard or a conservationist looking to restore habitats, seed bombs are a fun and easy way to make a positive impact on the environment.
Materials Needed – How to Make Seed Bombs: A Step-by-Step Guide
When it comes to making seed bombs, you’ll need a few key materials to get started. These materials will help you create the perfect mixture that will hold your seeds together and protect them until they’re ready to sprout.
Choosing the Right Seeds
The first thing you’ll need is a selection of seeds. You can choose from a variety of wildflower mixes, native seeds, flowers, vegetables, or any other type of seed you’d like to plant. It’s important to choose seeds that are appropriate for your region and the time of year you’ll be planting them.
Selecting the Proper Clay
The next material you’ll need is clay. You can use a variety of different clays, but the most common type used for seed bombs is air-dry clay. You can also use red clay powder or any other type of clay powder that will bind well with the seeds.
Soil and Compost Components
You’ll also need soil and compost components to help your seeds grow. You can use potting soil or any other type of soil that is appropriate for your seeds. Compost is also a great addition to your seed bomb mixture because it provides nutrients for your seeds as they grow.
It’s important to note that you’ll need a binding agent to help your seed bombs stay together. Some people use flour or cornstarch, but I prefer to use a mixture of water and clay powder. This creates a sticky mixture that will hold your seeds together and protect them until they’re ready to sprout.
In summary, to make seed bombs you’ll need:
- Seeds
- Clay
- Soil
- Compost
- Binding agent
With these materials, you’ll be able to create your seed bombs and start planting your favorite flowers, vegetables, or other plants.
Step-by-step guide to Create Seed Bombs
As an avid gardener, I love experimenting with different methods to grow plants. One of my favorite techniques is making seed bombs. They are easy to make, fun to use, and a great way to add some greenery to your garden. Here is a step-by-step guide on how to make your seed bombs.
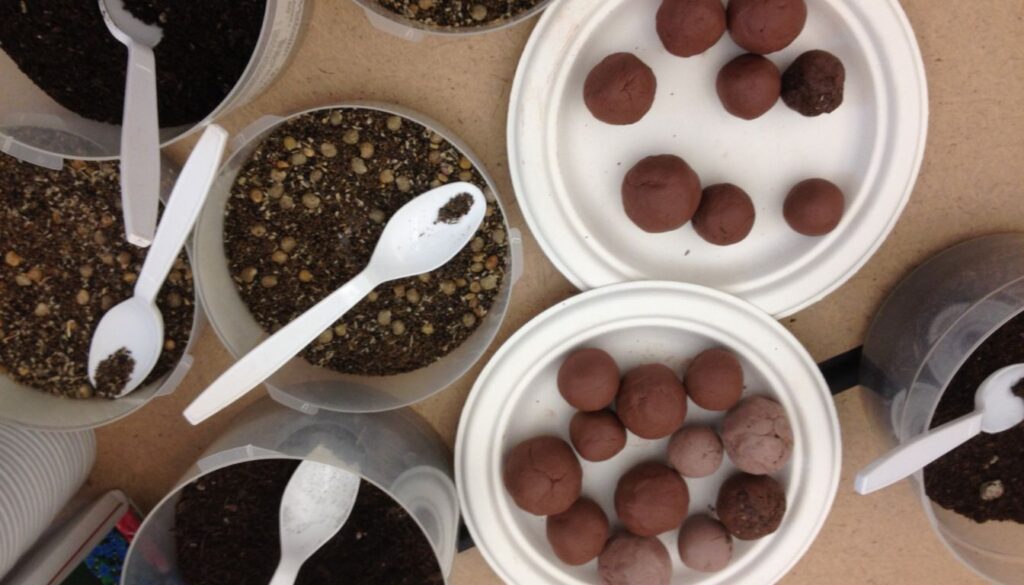
Mixing the Ingredients
To make seed bombs, you will need a mixing bowl, clay soil or air dry clay, seed mix, and potting mix. In a mixing bowl, combine 5 cups of compost, 2-3 cups of clay powder or clay soil, and 1 cup of seed mix. Slowly add water to the mixture and knead it with your hands until everything sticks together. The mixture should be moist but not too wet.
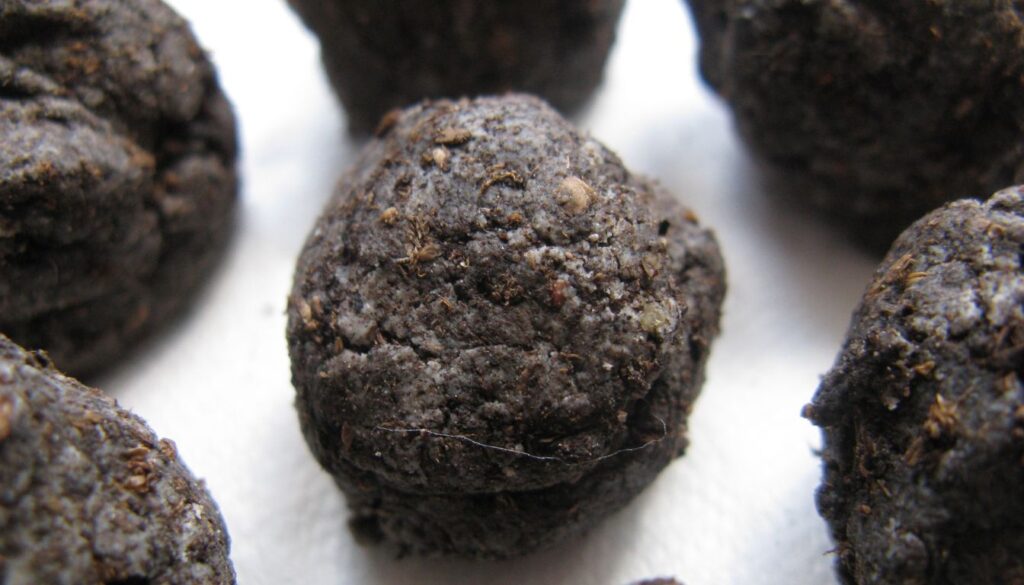
Forming the Seed Balls
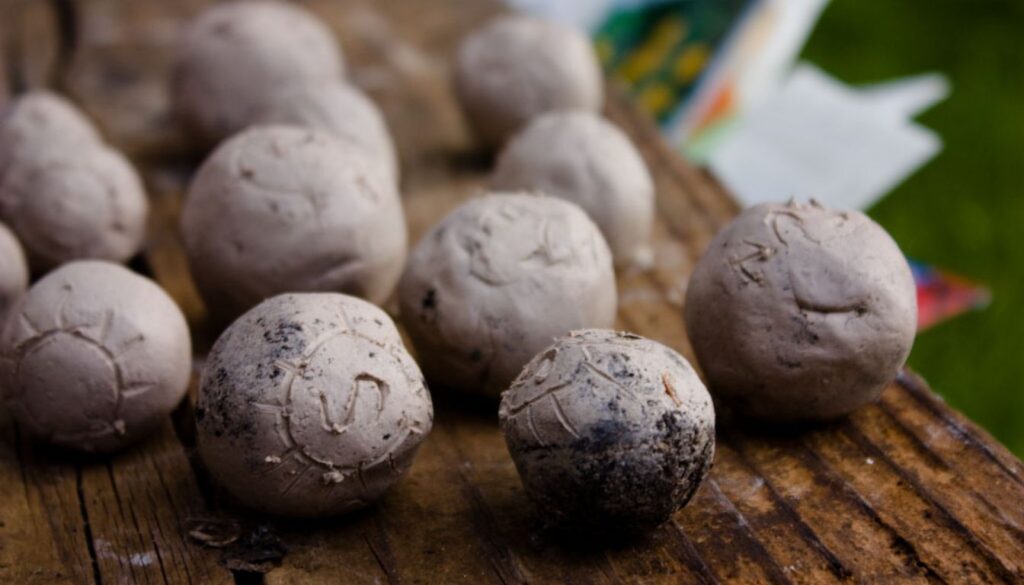
Once the mixture is ready, it’s time to form the seed balls. Scoop out small amounts of the mixture and roll them into firm balls. You can make them any size you like, but I find that balls about 1-1.5 inches in diameter work well. Make a small hollow in the center of each ball and add a pinch of potting mix. Then, add your desired seeds to the hollow and cover them with a pinch of potting mix.
Drying Process
After you have formed all the seed balls, it’s time to let them dry. Place them in a sunny spot and let them air dry for 24-48 hours. Once they are completely dry, they are ready to use. You can store them in an airtight container until you are ready to use them.
Making seed bombs is a great DIY project that the whole family can enjoy. With a little bit of patience and creativity, you can create your unique seed bombs that will help beautify your garden.
Planting Seed Bombs – How to Make Seed Bombs: A Step-by-Step Guide
Planting seed bombs is a fun and easy way to grow plants in areas that need a little extra help. In this section, I will guide you through the process of planting seed bombs, from choosing the right location to the germination process.
Choosing the Right Location
Before planting seed bombs, it is important to choose the right location. Look for an area that receives plenty of sunlight and has well-draining soil. The planting area should also be free of weeds and other plants that may compete with your seed bombs.
Consider the climate and habitat of the planting area as well. Different plants thrive in different conditions, so choose seed bombs that are appropriate for the climate and habitat of your planting area. For example, sunflowers and cosmos are great for sunny areas, while shade-loving plants like ferns and hostas are better suited for shaded areas.
The Planting Process
To plant seed bombs, simply toss them onto the soil, making sure they are evenly spaced. You can also gently press them into the soil to ensure good contact with the soil. Make sure to water the area well after planting to help the seed bombs germinate.
If you are planting during a dry season, you may need to water the area regularly to ensure the seed bombs have enough water to germinate. On the other hand, if you are planting during a rainy season, you may not need to water the area at all.
Germination and Growth
After planting seed bombs, it may take a few weeks for the seeds to germinate. During this time, it is important to keep the area moist to help the seeds germinate and grow. Once the plants have started to grow, you can gradually reduce the amount of water you give them.
As the plants grow, you may need to thin them out to ensure they have enough space to grow. You can also fertilize the plants to help them grow faster and stronger.
By following these simple steps, you can plant seed bombs and watch them grow into beautiful plants. With a little patience and care, you can create a beautiful and thriving garden in no time!
Seed Bomb Variations – How to Make Seed Bombs: A Step-by-Step Guide
If you’re looking for a fun and easy way to spread some greenery, seed bombs are a great option. They’re simple to make, and you can customize them to fit your needs. Here are a few variations to get you started:
Wildflower Seed Bombs
Wildflower seed bombs are a popular choice for those who want to add some color to their garden. You can use a mix of native seeds or choose specific wildflowers that you love. Some popular options include asters, black-eyed susans, and coneflowers.
When making wildflower seed bombs, it’s important to choose seeds that are appropriate for your climate. You can find seed mixes specifically designed for your region, or you can do some research to find out which wildflowers will thrive in your area.
Vegetable and Herb Seed Bombs
If you want to grow your own food, vegetable and herb seed bombs are a great option. You can choose from a variety of vegetables and herbs, including annuals like tomatoes and peppers, and perennials like asparagus and rhubarb.
When making vegetable and herb seed bombs, it’s important to choose seeds that are appropriate for your climate and soil type. You’ll also want to consider the amount of sunlight your garden gets, as some vegetables and herbs require more sun than others.
Specialty Seed Bombs
Finally, if you’re feeling creative, you can make specialty seed bombs for specific purposes. For example, you could make seed bombs that attract bees or butterflies, or seed bombs that are designed to grow in shady areas.
When making specialty seed bombs, it’s important to choose seeds that are appropriate for your purpose. For example, if you want to attract bees, you’ll want to choose flowers that are known to be bee-friendly, such as sunflowers and lavender.
No matter what type of seed bomb you choose to make, the process is simple and rewarding. With a little bit of effort, you can create a beautiful garden that’s full of life and color.
Uses and Applications
Seed bombs are versatile and can be used for various purposes. Here are some of the ways I have found seed bombs to be useful:
As Eco-Friendly Gifts
Seed bombs make great gifts for friends and family who are interested in gardening or the environment. Homemade seed bombs can be packaged in small, biodegradable bags or boxes and given as wedding favors or party favors. They are also perfect for bulk orders and can be ordered in large quantities for community garden projects.
Educational Purposes
Seed bombs can be used as a tool to teach children and adults about the importance of plants and the environment. They can be used in science classes to teach students about plant habitats, germination, and growth. Seed bombs can also be used in community outreach programs to teach people how to create their own gardens and green spaces.
Community Projects
Seed bombs are perfect for community garden projects as they can be used to plant flowers, herbs, and vegetables in vacant lots and other underutilized spaces. They can also be used to beautify areas that have been damaged by natural disasters or urban development. Seed bombs are an easy and cost-effective way to create green spaces and promote environmental sustainability.
Seed bombs are a versatile and eco-friendly tool that can be used for a variety of purposes. Whether you are making them as gifts, using them for educational purposes, or planting them in community garden projects, seed bombs are an easy and effective way to promote gardening and environmental sustainability.
Before You Go – How to Make Seed Bombs: A Step-by-Step Guide
Let’s dive into the wonderful world of Seed Bombs and how they’re intertwined with our home base, theherbprof.com.
Seed Bombs, those little bundles of green potential, are a perfect representation of what we’re all about here at theherbprof.com. Each seed bomb is a tiny package of possibility, ready to burst into life with a bit of care and attention.
Now, when you pop over to theherbprof.com, you’re not just visiting a website. You’re stepping into a greenhouse of knowledge, a place where we celebrate the magic of plants and their power to heal, nourish, and delight.
And guess what? Our Seed Bombs are part of that magic! Each time you make and plant a seed bomb, you’re participating in the cycle of life, contributing to the beauty of our planet, and learning about the wonders of nature. These are the same values we cherish and share on theherbprof.com.
So, in a way, our Seed Bombs and theherbprof.com are like two vines on the same trellis, supporting and nourishing each other as they reach for the sun.
Remember, every seed bomb you make adds a splash of green to our world, just like every visit to theherbprof.com helps our community grow. So, let’s keep making those Seed Bombs and nurturing our connection with theherbprof.com. After all, we’re all gardeners in this big, beautiful garden we call Earth!
References – How to Make Seed Bombs: A Step-by-Step Guide
Little Herb Encyclopedia, by Jack Ritchason; N.D., Woodland Publishing Incorporated, 1995
The Ultimate Healing System, Course Manual, Copyright 1985, Don Lepore
Planetary Herbology, Michael Tierra, C.A., N.D., Lotus Press, 1988
Handbook of Medicinal Herbs, by James A. Duke, Pub. CRP Second Edition 2007
The Complete Medicinal Herbal, by Penelope Ody, Published by Dorling Kindersley
Check the Following Articles!
Roasting Garlic in Oven: A Simple Guide to Delicious Dishes
Food You Can Grow from Scraps: More Money Less Waste!
Grow Carrots in Containers: Tips for The Best Harvest
Christmas Cactus Cuttings: Propagate & Grow Them Now!
Frequently Asked Questions – How to Make Seed Bombs: A Step-by-Step Guide
What is the best type of clay to use for making seed bombs?
The best type of clay to use for making seed bombs is natural clay, which is free from any additives or chemicals. Bentonite clay is commonly used as it is readily available and has excellent binding properties. However, any type of natural clay will work as long as it has the right consistency.
Can seed bombs be made without using clay, and if so, how?
Yes, seed bombs can be made without using clay. One alternative is to use flour as a binding agent. Another option is to use paper pulp to create seed bombs. However, it is important to note that these methods may not be as effective as using clay.
What are the most suitable seeds to include in a seed bomb?
The most suitable seeds to include in a seed bomb are native wildflower seeds that are adapted to the local climate and soil conditions. These seeds will have a higher chance of germination and survival. It is important to choose seeds that are not invasive and will not harm the local ecosystem.
Is it possible to create seed bombs using paper, and what is the method?
Yes, it is possible to create seed bombs using paper. The method involves tearing paper into small pieces, soaking it in water for a few hours, and then blending the paper and water until it forms a pulp. The seeds are then added to the pulp and mixed well. The mixture is then formed into balls and left to dry.
How can you make seed bombs using flour as a binding agent?
To make seed bombs using flour, mix flour and water until it forms a dough-like consistency. Add seeds and mix well. Roll the mixture into small balls and let them dry for a few hours. Once dry, the seed bombs can be planted.
What are the steps to making a simple and effective DIY seed bomb?
To make a simple and effective DIY seed bomb, you will need clay, compost, and seeds. Mix 1 cup of seeds with 5 cups of compost and 2-3 cups of clay powder. Slowly mix in water with your hands until everything sticks together. Roll the mixture into firm balls and leave them to dry in a sunny spot for 24 to 48 hours. Once dry, the seed bombs can be planted in the desired location.